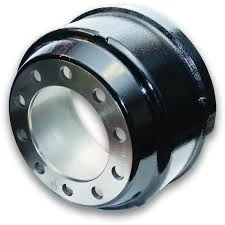
Guide to Removing Brake Drums from Your Caravan for Easy Maintenance
Removing a Caravan Brake Drum A Step-by-Step Guide
Maintaining your caravan's braking system is essential for safety and optimal performance on the road. One critical component of this system is the brake drum, which houses the brake shoes and is vital for effective braking. If you experience brake issues or need to replace worn-out components, you may find yourself needing to remove the brake drum. This article will provide a comprehensive guide to safely and effectively removing a caravan brake drum.
Tools and Materials Needed
Before starting the process, gather the necessary tools and materials. You’ll need
- A jack and jack stands - A tire iron - A wrench set - A brake drum puller (if necessary) - Lubricant or penetrating oil - Clean rags - Safety gloves and goggles
Safety First
Before you begin any work on your caravan, ensure you prioritize safety. Always wear safety gloves and goggles to protect yourself from dirt, debris, and potential injuries. It’s also crucial to work in a well-ventilated area and on stable ground to avoid any accidents.
Step 1 Preparing the Caravan
Start by parking your caravan on a flat surface. Engage the parking brake to prevent any movement during the process. If you need to, chock the wheels to add an extra layer of safety.
Step 2 Loosening the Wheel Nuts
Using a tire iron, loosen the wheel nuts on the wheel that contains the brake drum. Don’t remove them entirely just yet; just break their initial tightness. Loosening them while the wheel is still on the ground helps stabilize the caravan and makes the process easier.
Step 3 Lifting the Caravan
Next, you’ll need to lift the caravan off the ground using a jack. Position the jack under the designated lifting point (consult your owner’s manual for accurate locations) and raise the caravan until the wheel is off the ground. Once elevated, replace the jack with jack stands to support the vehicle securely. Never work under a vehicle supported solely by a jack.
Step 4 Removing the Wheel
caravan brake drum removal

Now that the caravan is securely lifted, you can remove the loosened wheel nuts completely. Take off the wheel, placing it on a soft surface to avoid scratches. With the wheel removed, you should have clear access to the brake drum.
Step 5 Inspecting the Brake Drum
Before proceeding to remove the brake drum, take a few moments to inspect it for any visible signs of wear or damage. If you notice excessive scoring, cracking, or heavy glazing, it may be time to replace it.
Step 6 Removing the Brake Drum
In many cases, the brake drum can be removed by simply pulling it off. However, if it appears stuck or rusted in place, apply a spraying lubricant or penetrating oil around the drum where it meets the hub. Allow it to sit for several minutes to facilitate easier removal.
If the drum is still difficult to remove, you may need to use a brake drum puller. Attach the puller according to the manufacturer's instructions, making sure it is securely fastened. Gradually tighten the puller’s screw while carefully monitoring the process. The drum should begin to loosen and eventually come free.
Step 7 Cleaning and Inspection
With the brake drum removed, take this opportunity to clean the area. Use rags to wipe away any dust, grime, or brake dust around the brake shoes and components. Inspect the brake shoes, springs, and other components for wear and replace them if necessary.
Step 8 Reinstallation
Once you’ve completed the necessary inspections and repairs, it’s time to reinstall the brake drum. Align it over the wheel hub and push or slide it into place until it sits securely. Reattach the wheel and hand-tighten the nuts before lowering the caravan back to the ground.
Final Steps and Safety Checks
After lowering the caravan, use the tire iron to tighten the wheel nuts fully in a crisscross pattern to ensure even tension. Finally, before hitting the road, conduct a brake test to ensure everything is functioning properly.
By following this guide, you should be able to successfully remove and replace your caravan's brake drum, enabling you to maintain your vehicle’s braking system effectively. Regular maintenance and inspections will help ensure a safe and smooth journey on your caravanning adventures. Happy travels!
-
The Power and Reliability of Brake DrumsसमाचारAug.27,2025
-
The High-Quality Truck Brake DrumsसमाचारAug.27,2025
-
Quality Brake Drums for Reliable PerformanceसमाचारAug.27,2025
-
Get the Quality Semi Trailer Brake Drums for Your FleetसमाचारAug.27,2025
-
Everything You Need to Know About Brake DrumsसमाचारAug.27,2025
-
Enhance Your Vehicle's Performance with Reliable Brake DrumsसमाचारAug.27,2025
-
Truck Drum Brake Spring Replacement ProcedureसमाचारAug.22,2025


