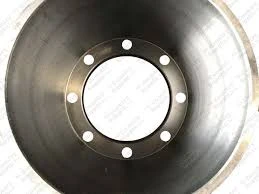
Converting Brake Drums to Rotors for Improved Vehicle Performance and Safety
How to Change Brake Drums to Rotors
Upgrading your vehicle from brake drums to rotors can significantly enhance braking performance, offering improved heat dissipation, shorter stopping distances, and reduced brake fade. This conversion can be a bit involved, requiring tools and mechanical knowledge, but with careful preparation and attention to detail, you can perform this upgrade yourself. Here’s a step-by-step guide to help you change brake drums to rotors.
Tools and Materials Needed
Before you start, gather the following tools and materials
- Jack and jack stands - Lug wrench - Socket set - Brake cleaner - New rotors and brake pads - Brake calipers (if needed) - C-clamp or brake tool - Torque wrench - Anti-seize lubricant
Step 1 Safety First
Safety should always be your priority. Begin by parking your vehicle on a flat surface and ensuring the ignition is off. Engage the parking brake and place wheel chocks behind the rear wheels to prevent movement.
Step 2 Removing the Wheels
Using a lug wrench, loosen the lug nuts of the wheels where you’ll be changing the brakes. Lift the vehicle using a jack and securely place jack stands under the vehicle for added stability. Once the vehicle is safely elevated, remove the lug nuts completely and take off the wheels.
Step 3 Removing Brake Drums
With the wheels off, locate the brake drums. You may need to remove the retaining screws that hold the drum in place. If the drum is stuck, tap it gently with a hammer to free it from the hub. Once free, carefully pull the drum off the wheel hub, revealing the brake shoes and hardware.
Step 4 Inspecting and Removing Components
Examine the brake shoes, springs, and backing plate for wear and damage. If these components appear excessively worn, consider replacing them as well. Remove the brake shoes, springs, and any other hardware to access the backing plate.
how to change brake drums to rotors

Step 5 Installing the New Rotors
Before installing the new rotors, clean the hub surface with brake cleaner to remove any debris or old grease. Place the new rotor onto the hub. If your vehicle uses rotor retaining screws, install them now. Make sure the rotor spins freely without obstruction.
Step 6 Installing the Brake Calipers
If you are using new calipers, install them according to the manufacturer’s instructions. If you are reusing the old ones, inspect them for leaks or wear. To install the new brake pads, compress the caliper piston using a C-clamp or a specialized brake tool. This will provide enough space for the new pads to fit over the new rotor.
Step 7 Putting it All Together
Once the pads are in place, position the caliper over the pads and rotor. Ensure that the caliper bolts or brackets are tightened to the manufacturer’s specifications using a torque wrench. Replace the wheel onto the hub and hand-tighten the lug nuts.
Step 8 Lowering the Vehicle
Carefully lower the vehicle back to the ground using the jack and remove the jack stands. Once the vehicle is back on the ground, use a torque wrench to tighten the lug nuts to the recommended specification in a crisscross pattern. This ensures that the pressure is evenly distributed.
Step 9 Final Checks
Before hitting the road, pump the brake pedal several times to ensure the brake pads seat correctly against the rotor. Check for any abnormalities, such as noises or vibrations. Also, inspect the brake fluid level in the master cylinder and top it off if necessary.
Conclusion
Changing brake drums to rotors can significantly enhance your vehicle’s braking efficiency. While this process may seem daunting, following these steps carefully can yield satisfying results. If at any point you feel unsure about the process, don’t hesitate to consult a professional mechanic. Remember, proper braking is crucial for your safety and that of others on the road. Happy motoring!
-
Brake Drums for Trucks | OEM-Grade, Factory DirectNewsNov.10,2025
-
High-Performance Brake Drums for Trucks | OEM & ISONewsNov.10,2025
-
Brake Drums Built to Last — OEM-Grade, Balanced for TrucksNewsNov.10,2025
-
Brake Drums for Trucks – OEM-Grade, Durable, Low NoiseNewsNov.10,2025
-
Brake Drums for Trucks | OEM, ISO-Certified, Fast DeliveryNewsNov.10,2025
-
Brake Drums: OEM-Grade, Precision Balanced, Factory DirectNewsNov.03,2025
-
Brake Drums: Heavy-Duty, OEM-Grade, Precision-BalancedNewsNov.03,2025


