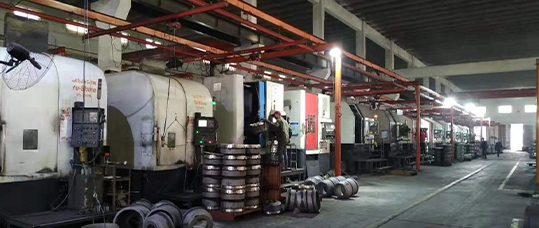
painting drum brakes
Understanding Painting Drum Brakes A Comprehensive Guide
Painting drum brakes is often overlooked in vehicle maintenance and customization. However, it is an aspect that can enhance both the aesthetic appeal and potentially the longevity of the brake system. In this guide, we'll delve into the importance, techniques, and benefits of painting drum brakes.
What Are Drum Brakes?
Drum brakes are a type of braking system commonly used in vehicles, particularly older models and some current economical cars. They consist of a drum that rotates with the wheel and brake shoes that press against the inner surface of the drum to create friction, which slows down or stops the vehicle. Although disc brakes are becoming the standard in modern vehicles due to their superior performance, drum brakes are still prevalent, especially in rear-end installations.
The Importance of Painting Drum Brakes
Painting drum brakes can serve several purposes
1. Corrosion Prevention Brake drums are typically made of cast iron or aluminum, which are prone to rust and corrosion, especially in areas with high humidity or where road salt is used. A good quality paint can help protect the metal from moisture and other elements that contribute to rust formation.
2. Heat Dissipation While painting drum brakes isn’t primarily for heat management, certain types of high-temperature paints can withstand the heat generated during braking. This can help maintain the integrity of the brake components over time.
3. Aesthetic Appeal Personalized and colorful drum brakes can be an appealing way to enhance the overall look of a vehicle, particularly for car enthusiasts. Custom-painted drum brakes can distinguish a vehicle and showcase the owner’s style and personality.
4. Easy Identification For those who frequently perform maintenance on their vehicles, a distinct paint job can help easily identify the brake components. This can be particularly useful in distinguishing between front and rear brakes, or between different vehicles in a multi-car household.
Techniques for Painting Drum Brakes
Painting drum brakes is a process that requires careful preparation and execution. Here is a step-by-step guide
painting drum brakes

1. Gather Materials You will need high-temperature brake paint, sandpaper or a wire brush, a clean cloth, masking tape, and a jack for lifting the vehicle.
2. Prepare the Vehicle Safely raise the vehicle using a jack and secure it with jack stands. Remove the wheel to access the brake drum.
3. Clean the Brake Drum Use a wire brush or sandpaper to scrub any rust, dirt, or old paint off the drum. This step is crucial for helping the new paint adhere properly.
4. Mask Off Areas Use masking tape to cover any parts of the brake system that should not be painted, such as the brake shoes, wheel bearings, and any other moving components.
5. Apply Primer If the drum is heavily corroded or pitted, applying a high-temperature primer can provide an extra layer of protection and help the paint adhere better.
6. Paint the Drum Apply a thin layer of high-temperature brake paint. It’s best to spray the paint rather than brush it on, as this will help achieve a smoother, even application. Multiple thin coats are preferable to one thick coat; allow each coat to dry according to the manufacturer’s instructions.
7. Reassemble After the final coat of paint has dried completely, carefully remove the masking tape and reassemble the wheel. Make sure to lower the vehicle safely back to the ground.
8. Cure the Paint Some paints require curing, which may involve driving the vehicle for a short distance. Again, refer to the paint’s instructions for specific curing requirements.
Benefits of Maintaining Painted Drum Brakes
By taking the time to paint your drum brakes, not only do you improve the vehicle's visual appeal, but you also contribute to the overall maintenance and protection of the brake system. Regular upkeep can lead to extended brake life, better performance, and a safer driving experience.
In conclusion, painting drum brakes, while often seen as a minor detail, can have significant advantages. From aesthetics to protective measures against corrosion, taking the time for this DIY project can be rewarding for any car enthusiast, blending functionality with style.
-
The Power and Reliability of Brake DrumsNewsAug.27,2025
-
The High-Quality Truck Brake DrumsNewsAug.27,2025
-
Quality Brake Drums for Reliable PerformanceNewsAug.27,2025
-
Get the Quality Semi Trailer Brake Drums for Your FleetNewsAug.27,2025
-
Everything You Need to Know About Brake DrumsNewsAug.27,2025
-
Enhance Your Vehicle's Performance with Reliable Brake DrumsNewsAug.27,2025
-
Truck Drum Brake Spring Replacement ProcedureNewsAug.22,2025


