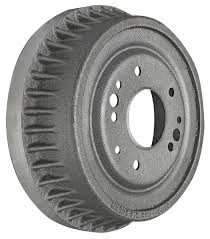
removing rear drum brakes
Removing Rear Drum Brakes A Step-by-Step Guide
Removing rear drum brakes might seem like a daunting task, but with the right tools and a little patience, it can be a manageable DIY project. Whether you’re replacing old drums, upgrading your brake system, or performing routine maintenance, understanding the removal process is essential for any vehicle owner. Below is a comprehensive guide on how to safely and effectively remove rear drum brakes.
Tools and Materials Needed
Before you begin, gather the following tools and materials
- Jack and jack stands - Lug wrench - Brake drum puller (if necessary) - Screwdriver (flathead and Phillips) - Pliers - Ratchet and socket set - Brake cleaner - Old rags or shop towels - Replacement parts (if applicable)
Step-by-Step Instructions
1. Safety First Ensure that your vehicle is parked on a flat surface. Engage the parking brake and place wheel chocks in front of the front tires to prevent any movement.
2. Loosen Lug Nuts Using a lug wrench, slightly loosen the lug nuts on the rear wheels. Do not remove them completely at this stage.
3. Raise the Vehicle Carefully use a jack to lift the rear of the vehicle off the ground. Once elevated, securely place jack stands under the vehicle to provide stability.
5. Inspect the Brake Assemblies Before removing the drum, take a moment to inspect the brake assemblies. Look for any visible damage or excessive wear on the components.
removing rear drum brakes

6. Remove Adjustment Access Cover If your vehicle has an access cover for the brake adjuster, remove it using a screwdriver. This will allow you to adjust the brake shoes if they are sticking to the drum.
7. Adjust the Brake Shoes If the drum is difficult to remove, you may need to adjust the brake shoes inward. This is done by turning the adjustment wheel through the access hole. Turn the wheel until the shoes retract enough to allow the drum to come off.
8. Remove the Brake Drum Gently tap the drum with a rubber mallet if it is stuck. If necessary, use a brake drum puller to help loosen it. Once it’s loose, pull the drum straight off the wheel hub.
9. Inspect the Components With the drum removed, take a good look at the brake shoes, springs, and other components. Look for signs of wear, damage, or corrosion. It’s a good idea to replace any worn parts.
10. Reassembly If you’re planning to replace or service components, now’s the time. Otherwise, reinstall the drum by sliding it back onto the hub and ensuring it seats correctly.
11. Replace the Wheels Place the rear wheels back onto the vehicle, hand-tightening the lug nuts.
12. Lower the Vehicle Remove the jack stands and lower the vehicle back to the ground.
13. Tighten Lug Nuts Once the vehicle is securely on the ground, use the lug wrench to tighten the lug nuts in a crisscross pattern to ensure even tightening.
Conclusion
Removing rear drum brakes may require some effort, but with a little understanding and the right tools, it can be accomplished successfully. Always remember to consult your vehicle’s manual for any specific instructions related to your make and model. Proper maintenance and timely replacements will ensure the longevity and effectiveness of your braking system, keeping you safe on the road.
-
Truck Drum Brake Spring Replacement ProcedureNewsAug.22,2025
-
Evolution Of Brake Drum Function Designs In Automotive HistoryNewsAug.22,2025
-
Drum Brake Motor Thermal Management SolutionsNewsAug.22,2025
-
Essential tools for brakes and drums repair jobsNewsAug.22,2025
-
Trailer Drum Brake Self-Adjusting Mechanisms ExplainedNewsAug.22,2025
-
Brake Drum Types in Vintage Auto RestorationNewsAug.22,2025
-
Rear Drum Brakes Maintenance TipsNewsAug.04,2025


