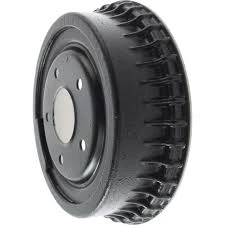
how do you change drum brakes to disc brakes
Converting Drum Brakes to Disc Brakes A Comprehensive Guide
When it comes to upgrading your vehicle's braking system, one of the most significant enhancements you can make is to replace drum brakes with disc brakes. This upgrade not only improves braking performance but also enhances safety, responsiveness, and overall driving experience. Here’s a step-by-step guide on how to make this conversion successfully.
Understanding the Basics
Drum brakes consist of a cylindrical drum that rotates with the wheel and brake shoes that press against the drum to create friction. While effective, drum brakes can suffer from issues such as brake fade, overheating, and inconsistent performance, especially under heavy use. On the other hand, disc brakes employ a rotor that spins with the wheel and uses calipers to squeeze the brake pads against the rotor, providing superior stopping power and better heat dissipation.
1. Assess Compatibility
Before you start the conversion process, it’s vital to ensure that your vehicle can accommodate disc brakes. Consult your vehicle's service manual or a professional mechanic to determine the compatibility of your model with disc brake components. Consider factors such as wheel size, suspension geometry, and available mounting points.
2. Gather Required Parts
A successful conversion necessitates the right components. You’ll need
- Disc brake rotors - Brake calipers - Brake pads - A new master cylinder (if your existing system can’t handle the increased fluid displacement) - Brake lines (often longer ones are needed for disc brakes) - Mounting brackets and hardware
Purchasing a complete disc brake conversion kit can make this process easier, as these kits typically include all required parts and detailed installation instructions.
how do you change drum brakes to disc brakes

Begin by safely lifting the vehicle and securing it on jack stands. Remove the wheel and then detach the drum brake assembly. This typically involves removing the brake drum, disconnecting the brake shoes, and detaching any associated hardware. Be cautious of the residual brake fluid and pressure when disconnecting lines.
4. Install the Disc Brake Components
Once the drum brakes are removed, you can start installing the disc brake system. Begin by mounting the new brackets, ensuring they are securely attached to the spindle. Next, position the disc rotors onto the hubs and install the brake calipers onto the brackets. Pay close attention to the orientation of the calipers, as some designs may have specific requirements.
5. Connect the Brake Lines
After installing the calipers, it’s time to connect the brake lines. If a new master cylinder is included in your conversion, install it and ensure it is compatible with the existing brake lines. Carefully bleed the brake lines to remove any air bubbles, which can lead to brake failure or a spongy feel when pressing the pedal.
6. Testing and Adjustment
Before driving the vehicle, thoroughly inspect the installation to verify that all components are secure. Once satisfied, perform a series of test stops at low speeds. Gradually increase your speed as you become more comfortable with the new braking system. Listen for unusual sounds and pay attention to any vibrations or pulling to one side while stopping.
Conclusion
Upgrading from drum to disc brakes is an investment that can significantly enhance your vehicle’s braking performance and safety. While the process requires careful consideration and mechanical skills, the benefits are well worth the effort. By following these steps and prioritizing safety, you can enjoy improved braking power and a more responsive driving experience.
-
The Power and Reliability of Brake DrumsIzindabaAug.27,2025
-
The High-Quality Truck Brake DrumsIzindabaAug.27,2025
-
Quality Brake Drums for Reliable PerformanceIzindabaAug.27,2025
-
Get the Quality Semi Trailer Brake Drums for Your FleetIzindabaAug.27,2025
-
Everything You Need to Know About Brake DrumsIzindabaAug.27,2025
-
Enhance Your Vehicle's Performance with Reliable Brake DrumsIzindabaAug.27,2025
-
Truck Drum Brake Spring Replacement ProcedureIzindabaAug.22,2025


