-
 Afrikaans
 -
 Albanian
 -
 Amharic
 -
 Arabic
 -
 Armenian
 -
 Azerbaijani
 -
 Basque
 -
 Belarusian
 -
 Bengali
 -
 Bosnian
 -
 Bulgarian
 -
 Catalan
 -
 Cebuano
 -
 Corsican
 -
 Croatian
 -
 Czech
Czech -
 Danish
 -
 Dutch
Dutch -
 Inglés
 -
 Esperanto
 -
 Estonian
 -
 Finnish
 -
 French
 -
 Frisian
 -
 Galician
 -
 Georgian
 -
 German
 -
 Greek
Greek -
 Gujarati
 -
 Haitian Creole
 -
 hausa
hausa -
 hawaiian
 -
 Hebrew
 -
 Hindi
Hindi -
 Miao
Miao -
 Hungarian
 -
 Icelandic
 -
 igbo
igbo -
 Indonesian
 -
 irish
irish -
 Italian
 -
 Japanese
 -
 Javanese
 -
 Kannada
 -
 kazakh
 -
 Khmer
Khmer -
 Rwandese
 -
 Korean
 -
 Kurdish
 -
 Kyrgyz
 -
 Lao
Lao -
 Latin
Latin -
 Latvian
 -
 Lithuanian
 -
 Luxembourgish
 -
 Macedonian
 -
 Malgashi
 -
 Malay
Malay -
 Malayalam
 -
 Maltese
 -
 Maori
Maori -
 Marathi
 -
 Mongolian
 -
 Myanmar
 -
 Nepali
 -
 Norwegian
 -
 Norwegian
 -
 Occitan
 -
 Pashto
 -
 Persian
 -
 Polish
 -
 Portuguese
 -
 Punjabi
 -
 Romanian
 -
 Russian
 -
 Samoan
 -
 Scottish Gaelic
 -
 Serbian
 -
 Sesotho
 -
 Shona
Shona -
 Sindhi
 -
 Sinhala
 -
 Slovak
 -
 Slovenian
 -
 Somali
 -
 Spanish
 -
 Sundanese
 -
 Swahili
 -
 Swedish
 -
 Tagalog
 -
 Tajik
Tajik -
 Tamil
Tamil -
 Tatar
Tatar -
 Telugu
 -
 Thai
Thai -
 Turkish
 -
 Turkmen
 -
 Ukrainian
 -
 Urdu
Urdu -
 Uighur
 -
 Uzbek
Uzbek -
 Vietnamese
 -
 Welsh
Welsh -
 Bantu
Bantu -
 Yiddish
 -
 Yoruba
 -
 Zulu
Zulu
how to change drum brakes to rotors
How to Change Drum Brakes to Rotors
Upgrading your vehicle’s drum brakes to rotors is a smart move that can enhance your car’s stopping power, improve heat dissipation, and provide a better pedal feel. Converting from drum brakes to disc brakes (rotors) may seem daunting, but with the right tools and knowledge, you can perform this upgrade at home. Here's a comprehensive guide on how to change drum brakes to rotors.
1. Gather the Necessary Tools and Parts
Before starting the conversion, you’ll need several tools, including
- A jack and jack stands - A lug wrench - A socket set - A torque wrench - Brake cleaner - New disc brake rotors and calipers - Brake pads designed for the new rotors - Brake fluid
Make sure to purchase rotors and calipers that are compatible with your vehicle model. It's also advisable to refer to the manufacturer’s manual for specific requirements.
2. Prepare Your Vehicle
Park your vehicle on a flat surface and engage the parking brake. Loosen the lug nuts on the rear wheels (the ones with drum brakes) before raising the vehicle with a jack. Secure the vehicle with jack stands to ensure safety while you work. Once elevated, remove the wheels by completely unscrewing the lug nuts.
3. Remove the Drum Brakes
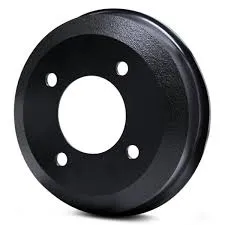
With the wheel off, you’ll have access to the drum brakes. Begin by removing the brake drum, which may require some force if it's stuck. If you encounter resistance, you may need to manually adjust the brake shoes to relieve pressure from the drum. Disconnect the brake lines attached to the wheel cylinder and remove the cylinder itself. Make sure to have a container ready to catch any brake fluid that might leak out.
how to change drum brakes to rotors

Next, take out the brake shoes and any other associated hardware. Be cautious when handling these parts, as they may contain springs under tension.
4. Install the New Disc Brake Components
With the drum and associated parts removed, it’s time to install the new rotor. Attach the new brake caliper bracket to the spindle using the screws and torque them to the specifications provided in the manual. Then slide the new rotor onto the hub, ensuring that it fits snugly.
Install the new brake calipers onto the bracket and secure them in place with the appropriate bolts. After that, insert the new brake pads into the caliper. Be sure they are correctly seated according to the installation guidelines.
5. Connect Brake Lines and Bleed the Brakes
Once the new disc brake setup is in place, connect the brake lines to the calipers. It’s essential to check for any leaks in the connections. Fill your brake fluid reservoir with fresh brake fluid, and then proceed to bleed the brakes. This process removes any air from the brake lines, ensuring more responsive brakes. Begin by starting with the caliper furthest from the master cylinder, working your way closer.
6. Reassemble and Test
Put the wheel back on and secure it with the lug nuts, ensuring they are tight. Lower the vehicle off the jack stands and recheck the tightness of the lug nuts. Finally, pump the brake pedal a few times to ensure that the brake pads make contact with the rotors and that the system is functioning correctly.
Take the vehicle for a test drive in a safe area to ensure that the brakes are performing well and without any issues. By following these steps, you can successfully change drum brakes to rotors, improving your vehicle's braking performance and safety.
-
What Are Drum BrakesNoticiasJul.07,2025
-
Understanding Brake Drum MaterialNoticiasJul.07,2025
-
Semi-Trailer Brake Drum: A Key Component for Extreme Loads and Long-Distance TransportNoticiasJul.07,2025
-
Drum Brake Pads for SaleNoticiasJul.07,2025
-
Brake Drums for SaleNoticiasJul.07,2025
-
Brake Drum ManufacturerNoticiasJul.07,2025
-
Aluminum Brake Drums: The Future of High-Performance CarsNoticiasJul.07,2025
