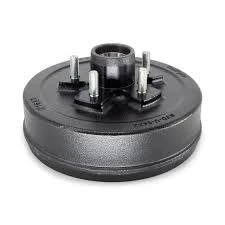
Steps to Properly Adjust Your Drum Parking Brake for Optimal Performance
How to Adjust Your Drum Parking Brake A Comprehensive Guide
Maintaining proper functionality of your vehicle’s drum parking brake is crucial for ensuring safety and preventing potential accidents. Over time, the parking brake can become loose or ineffective due to wear and tear or adjustments that may have been overlooked. Adjusting your drum parking brake is a task that you can accomplish yourself with some basic tools and knowledge. This article will guide you through the steps needed to properly adjust your drum parking brake.
Understanding Your Drum Parking Brake
The drum parking brake operates using a system of cables and levers that engage the brake shoes against the inner surface of a brake drum. When you pull the parking brake lever, it pulls the cable, which then pushes the brake shoes outward to create friction against the drum. This mechanism can become less effective if the brake shoes wear down or if the cable stretches, leading to inadequate braking performance.
Tools You Will Need
Before you begin, gather the following tools
- Jack and jack stands - Lug wrench - Flathead screwdriver - Wrench set - Brake cleaner (optional) - Gloves and safety goggles
Step-by-Step Guide to Adjusting the Drum Parking Brake
Step 1 Secure Your Vehicle
The first step in any maintenance task is to ensure your vehicle is on a stable surface. Park the car on a flat area, engage the regular brake, and put it in gear or set it to ‘park’ for automatic transmissions. Use wheel chocks to prevent any movement.
Step 2 Raise the Vehicle
Using a jack, carefully lift the vehicle and secure it with jack stands. This will allow you to access the rear wheels where the drum brakes are usually located.
Step 3 Remove the Wheel
how to adjust drum parking brake

Using the lug wrench, remove the lug nuts and take off the wheel to expose the brake drum. Make sure to keep the lug nuts in a safe place for reinstallation later.
Step 4 Inspect the Brake Components
Before adjusting the parking brake, inspect the brake shoes and drum for any signs of excessive wear. If the shoes are worn out or if the drum is scored or damaged, you may need to replace these components instead of just adjusting the brake.
Step 5 Locate the Adjuster
Inside the brake drum, there will be an adjustment screw or lever. This is usually located at the bottom or side of the brake assembly. In some vehicles, there might be a rubber plug on the backing plate that allows access to the adjuster.
Step 6 Adjust the Brake Shoes
To make adjustments, use the flathead screwdriver to turn the adjuster. Turning it clockwise will expand the brake shoes outward, while turning it counterclockwise will retract them. Adjust the shoes until they just come into contact with the drum. You should feel slight resistance when you manually rotate the drum, but it should not be overly tight or difficult to turn.
Step 7 Test the Parking Brake
After completing the adjustment on both sides, it’s time to test the parking brake. Reinstall the wheel and lower the vehicle to the ground. Engage the parking brake and try to move the car gently in gear. The vehicle should remain stationary. If it rolls, you may need further adjustments.
Step 8 Final Checks
Once you’re satisfied with the parking brake’s performance, double-check all components, ensuring everything is secured, and replace any components or seals if necessary. Make sure to reinstall the wheel firmly and lower the vehicle securely.
Conclusion
Adjusting your drum parking brake is a vital skill that contributes to your vehicle's safety. Regular maintenance and timely adjustments can prevent more significant issues down the line, ensuring that your emergency braking system remains responsive. If you encounter difficulties or feel unsure at any point, do not hesitate to seek professional assistance. A well-functioning drum parking brake is not just about convenience—it’s about safety on the road.
-
The Power and Reliability of Brake DrumsNouvellesAug.27,2025
-
The High-Quality Truck Brake DrumsNouvellesAug.27,2025
-
Quality Brake Drums for Reliable PerformanceNouvellesAug.27,2025
-
Get the Quality Semi Trailer Brake Drums for Your FleetNouvellesAug.27,2025
-
Everything You Need to Know About Brake DrumsNouvellesAug.27,2025
-
Enhance Your Vehicle's Performance with Reliable Brake DrumsNouvellesAug.27,2025
-
Truck Drum Brake Spring Replacement ProcedureNouvellesAug.22,2025


