-
 Afrikaans
 -
 Albanian
 -
 Amharic
 -
 Arabic
 -
 Armenian
 -
 Azerbaijani
 -
 Basque
 -
 Belarusian
 -
 Bengali
 -
 Bosnian
 -
 Bulgarian
 -
 Catalan
 -
 Cebuano
 -
 Corsican
 -
 Croatian
 -
 Czech
Czech -
 Danish
 -
 Dutch
Dutch -
 angle
angle -
 Esperanto
 -
 Estonian
 -
 Finnish
 -
 French
 -
 Frisian
 -
 Galician
 -
 Georgian
 -
 German
 -
 Greek
Greek -
 Gujarati
 -
 Haitian Creole
 -
 hausa
hausa -
 hawaiian
 -
 Hebrew
 -
 Hindi
Hindi -
 Miao
Miao -
 Hungarian
 -
 Icelandic
 -
 igbo
igbo -
 Indonesian
 -
 irish
irish -
 Italian
 -
 Japanese
 -
 Javanese
 -
 Kannada
 -
 kazakh
 -
 Khmer
Khmer -
 Rwandese
 -
 Korean
 -
 Kurdish
 -
 Kyrgyz
 -
 Lao
Lao -
 Latin
Latin -
 Latvian
 -
 Lithuanian
 -
 Luxembourgish
 -
 Macedonian
 -
 Malgashi
 -
 Malay
Malay -
 Malayalam
 -
 Maltese
 -
 Maori
Maori -
 Marathi
 -
 Mongolian
 -
 Myanmar
 -
 Nepali
 -
 Norwegian
 -
 Norwegian
 -
 Occitan
 -
 Pashto
 -
 Persian
 -
 Polish
 -
 Portuguese
 -
 Punjabi
 -
 Romanian
 -
 Russian
 -
 Samoan
 -
 Scottish Gaelic
 -
 Serbian
 -
 Sesotho
 -
 Shona
Shona -
 Sindhi
 -
 Sinhala
 -
 Slovak
 -
 Slovenian
 -
 Somali
 -
 Spanish
 -
 Sundanese
 -
 Swahili
 -
 Swedish
 -
 Tagalog
 -
 Tajik
Tajik -
 Tamil
Tamil -
 Tatar
Tatar -
 Telugu
 -
 Thai
Thai -
 Turkish
 -
 Turkmen
 -
 Ukrainian
 -
 Urdu
Urdu -
 Uighur
 -
 Uzbek
Uzbek -
 Vietnamese
 -
 Welsh
Welsh -
 Bantu
Bantu -
 Yiddish
 -
 Yoruba
 -
 Zulu
Zulu
Steps to Properly Adjust Your Brake Drums for Optimal Performance
How to Adjust Brake Drums A Comprehensive Guide
Properly functioning brake drums are crucial for the safety and performance of any vehicle. Brake drums, typically found in older vehicles and some heavy-duty ones, work with brake shoes to slow down or stop the vehicle. Over time, these components can become misaligned or lose their effectiveness, requiring adjustments. This article will guide you through the process of adjusting brake drums to ensure they operate efficiently and safely.
Understanding the Brake Drum System
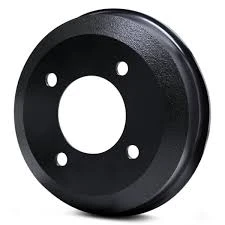
Before diving into the adjustment process, it’s essential to understand the components of a drum brake system. The primary parts include the brake drum, brake shoes, wheel cylinder, and adjuster screw. When you press the brake pedal, hydraulic pressure forces the wheel cylinder to push the brake shoes against the drum, creating friction that slows down the vehicle. If the brake shoes wear down or the system becomes misaligned, the braking efficiency can diminish, leading to longer stopping distances.
Tools Needed
To adjust your brake drums, you will need some basic tools
1. Jack and jack stands To safely lift the vehicle. 2. Lug wrench To remove the wheel. 3. Brake drum adjustment tool A flathead screwdriver or a specific drum adjustment tool may be necessary. 4. Brake cleaner To clean components if needed. 5. Safety goggles and gloves For personal protection.
Step-by-Step Guide to Adjusting Brake Drums
1. Safety First Park your vehicle on a flat, solid surface and engage the parking brake. Wear safety goggles and gloves to protect yourself from dirt and debris.
how to adjust brake drums

3. Remove the Wheel Using a lug wrench, remove the lug nuts and take off the wheel to expose the brake drum.
4. Inspect the Brake Components Before adjusting, look for any signs of wear or damage on the brake shoes, drum, and other components. If any parts need replacement, address that first.
5. Locate the Adjuster The adjuster is typically located at the rear of the brake assembly. It can often be accessed through a small hole in the backing plate.
6. Adjust the Brake Shoes Using the brake drum adjustment tool, turn the adjuster screw. To increase the contact between the brake shoes and the drum, turn it clockwise. If the shoes need to be pulled away, turn it counterclockwise. Aim for a slight drag of the shoes against the drum when you rotate the drum by hand.
7. Reassemble the Brake Assembly Once the adjustment is complete, carefully reattach the brake drum. Make sure it spins freely without excessive resistance.
8. Reinstall the Wheel Place the wheel back on and hand-tighten the lug nuts. Lower the vehicle from the jack stands and onto the ground. Finally, tighten the lug nuts to the manufacturer’s specifications using a star pattern to ensure even pressure.
9. Test Drive After completing the adjustments, take your vehicle for a short test drive. Pay attention to how the brakes respond. They should feel firm and effective without any unusual noises or pulling.
Final Thoughts
Adjusting brake drums is a necessary maintenance task that enhances driving safety and vehicle longevity. Regular checks and adjustments can help prevent premature wear and improve braking performance. If you feel uncomfortable performing this task or notice any significant issues, please consult a professional mechanic. A well-maintained brake system not only ensures your safety but also contributes to the overall efficiency of your vehicle.
-
Why Choosing the Right Brake Drum Manufacturer Matters for Vehicle Safety and PerformanceNouvèlJun.05,2025
-
Understanding Heavy Duty Brake Drums: Key to Truck Safety and PerformanceNouvèlJun.05,2025
-
Reliable Braking Systems: Rear and Trailer Drum Brake Solutions for Heavy-Duty ApplicationsNouvèlJun.05,2025
-
Power and Precision: Why Brake Drums Still Dominate in Vehicle Safety SystemsNouvèlJun.05,2025
-
Brake Drums: Essential Components for Vehicle Safety and PerformanceNouvèlJun.05,2025
-
Superior Brake Drums & Rotors for Reliable Stopping PowerNouvèlJun.03,2025
-
Premium Brake Drums for Maximum Stopping PowerNouvèlJun.03,2025
