-
 Afrikaans
 -
 Albanian
 -
 Amharic
 -
 Arabic
 -
 Armenian
 -
 Azerbaijani
 -
 Basque
 -
 Belarusian
 -
 Bengali
 -
 Bosnian
 -
 Bulgarian
 -
 Catalan
 -
 Cebuano
 -
 Corsican
 -
 Croatian
 -
 Czech
Czech -
 Danish
 -
 Dutch
Dutch -
 Inggris
 -
 Esperanto
 -
 Estonian
 -
 Finnish
 -
 French
 -
 Frisian
 -
 Galician
 -
 Georgian
 -
 German
 -
 Greek
Greek -
 Gujarati
 -
 Haitian Creole
 -
 hausa
hausa -
 hawaiian
 -
 Hebrew
 -
 Hindi
Hindi -
 Miao
Miao -
 Hungarian
 -
 Icelandic
 -
 igbo
igbo -
 Indonesian
 -
 irish
irish -
 Italian
 -
 Japanese
 -
 Javanese
 -
 Kannada
 -
 kazakh
 -
 Khmer
Khmer -
 Rwandese
 -
 Korean
 -
 Kurdish
 -
 Kyrgyz
 -
 Lao
Lao -
 Latin
Latin -
 Latvian
 -
 Lithuanian
 -
 Luxembourgish
 -
 Macedonian
 -
 Malgashi
 -
 Malay
Malay -
 Malayalam
 -
 Maltese
 -
 Maori
Maori -
 Marathi
 -
 Mongolian
 -
 Myanmar
 -
 Nepali
 -
 Norwegian
 -
 Norwegian
 -
 Occitan
 -
 Pashto
 -
 Persian
 -
 Polish
 -
 Portuguese
 -
 Punjabi
 -
 Romanian
 -
 Russian
 -
 Samoan
 -
 Scottish Gaelic
 -
 Serbian
 -
 Sesotho
 -
 Shona
Shona -
 Sindhi
 -
 Sinhala
 -
 Slovak
 -
 Slovenian
 -
 Somali
 -
 Spanish
 -
 Sundanese
 -
 Swahili
 -
 Swedish
 -
 Tagalog
 -
 Tajik
Tajik -
 Tamil
Tamil -
 Tatar
Tatar -
 Telugu
 -
 Thai
Thai -
 Turkish
 -
 Turkmen
 -
 Ukrainian
 -
 Urdu
Urdu -
 Uighur
 -
 Uzbek
Uzbek -
 Vietnamese
 -
 Welsh
Welsh -
 Bantu
Bantu -
 Yiddish
 -
 Yoruba
 -
 Zulu
Zulu
how to take a drum brake off
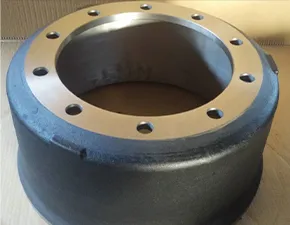
How to Take a Drum Brake Off A Step-by-Step Guide
Drum brakes are a common type of brake system found in many vehicles, especially older models. Understanding how to remove a drum brake is essential for any DIY mechanic or car enthusiast looking to perform routine maintenance or repairs. Here’s a step-by-step guide to help you take a drum brake off safely and effectively.
Tools and Materials Needed
Before you begin, make sure you have the following tools and materials on hand
- Jack and jack stands - Lug wrench - Brake cleaner - Screwdriver (flathead) - Pliers - Torque wrench - Replacement brake components (if necessary) - Safety goggles and gloves
Step 1 Ensure Safety
First and foremost, ensure your safety. Park your vehicle on a flat, stable surface and engage the parking brake. If you are working on the rear brakes, it is advisable to chock the front wheels to prevent any movement.
Step 2 Loosen the Lug Nuts
Using a lug wrench, slightly loosen the lug nuts of the wheel with the drum brake you want to remove. Do this before raising the vehicle off the ground to make it easier. Avoid removing them completely at this stage.
Step 3 Lift the Vehicle
Use a jack to lift the vehicle and then place the jack stands securely under the vehicle to support it
. Always ensure that the vehicle is stable before proceeding.Step 4 Remove the Wheel
Now that the vehicle is securely lifted, remove the loosened lug nuts entirely and take the wheel off. This will expose the drum brake assembly.
how to take a drum brake off

Step 5 Inspect the Drum
Take a moment to inspect the brake drum for any visible damage or excessive wear. If the drum appears to be in good condition, you can proceed with removal; if not, it may need to be replaced.
Step 6 Remove the Drum
Drum brakes are typically held in place by either screws or clips. If your drum is held in place by screws, use a screwdriver to remove them. If there are no visible fasteners, the drum might be stuck due to the brake shoes being pressed against it. In this case, you can gently tap the drum with a rubber mallet or tightening a couple of bolts on the drum's threaded holes to ease its removal.
Step 7 Disconnect the Brake Components
Once the drum is free, carefully pull it off. At this point, you may want to disconnect the brake shoe springs or any other components if you plan to replace them. Use pliers to remove the springs carefully and ensure you remember the configuration for reassembly later.
Step 8 Clean and Replace Parts
Now is a great time to clean any dust and debris from the brake assembly with brake cleaner. If any parts appear worn or damaged, replace them as necessary.
Step 9 Reassemble
Once you’ve completed your inspection, cleaning, and replacements, reverse the steps to reassemble the brake components. Place the drum back on, reconnect any components, and then reattach the wheel.
Step 10 Lower the Vehicle
Finally, carefully lower the vehicle down, remove the jack stands, and tighten the lug nuts securely in a crisscross pattern to ensure even pressure.
Remember, proper maintenance is critical for your vehicle's braking system. If you're unsure about any step in the process, consult your vehicle’s service manual or seek help from a professional mechanic.
-
Rear Drum Brakes Maintenance TipsKabarAug.04,2025
-
Key Components Affecting Brake Drum FunctionKabarAug.04,2025
-
Important Inspection for Truck Drum BrakeKabarAug.04,2025
-
How to Prepare for Changing Rear Drum BrakesKabarAug.04,2025
-
Essential Tools for Cleaning Drum Brakes ProperlyKabarAug.04,2025
-
Brake Drum Function GuideKabarAug.04,2025
-
Safety Features of Red Brake DrumsKabarAug.01,2025
