-
 Afrikaans
 -
 Albanian
 -
 Amharic
 -
 Arabic
 -
 Armenian
 -
 Azerbaijani
 -
 Basque
 -
 Belarusian
 -
 Bengali
 -
 Bosnian
 -
 Bulgarian
 -
 Catalan
 -
 Cebuano
 -
 Corsican
 -
 Croatian
 -
 Czech
Czech -
 Danish
 -
 Dutch
Dutch -
 ഇംഗ്ലീഷ്
 -
 Esperanto
 -
 Estonian
 -
 Finnish
 -
 French
 -
 Frisian
 -
 Galician
 -
 Georgian
 -
 German
 -
 Greek
Greek -
 Gujarati
 -
 Haitian Creole
 -
 hausa
hausa -
 hawaiian
 -
 Hebrew
 -
 Hindi
Hindi -
 Miao
Miao -
 Hungarian
 -
 Icelandic
 -
 igbo
igbo -
 Indonesian
 -
 irish
irish -
 Italian
 -
 Japanese
 -
 Javanese
 -
 Kannada
 -
 kazakh
 -
 Khmer
Khmer -
 Rwandese
 -
 Korean
 -
 Kurdish
 -
 Kyrgyz
 -
 Lao
Lao -
 Latin
Latin -
 Latvian
 -
 Lithuanian
 -
 Luxembourgish
 -
 Macedonian
 -
 Malgashi
 -
 Malay
Malay -
 Malayalam
 -
 Maltese
 -
 Maori
Maori -
 Marathi
 -
 Mongolian
 -
 Myanmar
 -
 Nepali
 -
 Norwegian
 -
 Norwegian
 -
 Occitan
 -
 Pashto
 -
 Persian
 -
 Polish
 -
 Portuguese
 -
 Punjabi
 -
 Romanian
 -
 Russian
 -
 Samoan
 -
 Scottish Gaelic
 -
 Serbian
 -
 Sesotho
 -
 Shona
Shona -
 Sindhi
 -
 Sinhala
 -
 Slovak
 -
 Slovenian
 -
 Somali
 -
 Spanish
 -
 Sundanese
 -
 Swahili
 -
 Swedish
 -
 Tagalog
 -
 Tajik
Tajik -
 Tamil
Tamil -
 Tatar
Tatar -
 Telugu
 -
 Thai
Thai -
 Turkish
 -
 Turkmen
 -
 Ukrainian
 -
 Urdu
Urdu -
 Uighur
 -
 Uzbek
Uzbek -
 Vietnamese
 -
 Welsh
Welsh -
 Bantu
Bantu -
 Yiddish
 -
 Yoruba
 -
 Zulu
Zulu
Steps to Upgrade Your Vehicle from Drum Brakes to Disk Brakes Efficiently
How to Convert Drum Brakes to Disc Brakes A Step-by-Step Guide
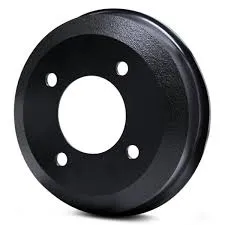
Upgrading your vehicle's braking system from drum brakes to disc brakes can significantly enhance stopping power, improve safety, and provide better performance under various driving conditions. While the process may seem daunting, with the right tools and knowledge, it's achievable for most DIY enthusiasts. This guide will provide you with a step-by-step approach to converting drum brakes to disc brakes.
Tools and Materials Needed
Before starting the conversion, ensure you have the following tools and materials
- Disc brake conversion kit (specific to your vehicle) - Brake fluid - Jack and jack stands - Lug wrench - Basic hand tools (wrenches, sockets, pliers) - Brake cleaner - Screwdrivers - Torque wrench
Step 1 Preparing Your Vehicle
1. Safety First Park your vehicle on a flat surface, engage the parking brake, and wear appropriate safety gear, including gloves and goggles. 2. Lift the Vehicle Use a jack to lift the front or rear of your vehicle, depending on which brakes you’re converting. Secure it with jack stands. 3. Remove the Wheels Using a lug wrench, take off the wheels to gain access to the braking system.
Step 2 Remove the Drum Brakes
1. Detach the Brake Components Remove the drum by unscrewing the retaining screws and pulling it off the axle. You may need to tap it gently with a rubber mallet if it’s stuck. 2. Disconnect Brake Components Carefully detach the brake shoes, springs, and other components. Note how they are arranged for reassembly. Labeling parts can help during installation. 3. Remove the Backing Plate Unscrew and remove the backing plate that holds the drum brake system in place.
how to convert drum brakes to disk brakes

Step 3 Installing the Disc Brake Components
1. Install the New Caliper Bracket Follow the instructions provided with your conversion kit to mount the caliper bracket to the spindle where the backing plate was attached. 2. Attach the Rotors Slide the new disc rotors onto the wheel hub. Make sure they are aligned properly and secure them using the existing lug bolts. 3. Position the Calipers Install the brake calipers on the new brackets, ensuring they are properly aligned with the rotors.
Step 4 Connect the Brake Lines
1. Attach Brake Lines If your conversion kit requires different or extended brake lines, connect those carefully. Ensure there are no leaks by checking all connections. 2. Fill Brake Fluid Fill the brake system with new brake fluid, and bleed the brakes by loosening the bleeder valves on the calipers and pumping the brake pedal until fluid comes out without bubbles.
Step 5 Final Checks and Installation
1. Check Alignment Make sure all screws and bolts are tightened to the manufacturer’s specifications using a torque wrench. 2. Reinstall Wheels Put the wheels back on, tightening the lug nuts in a crisscross pattern to ensure even pressure. 3. Lower the Vehicle Carefully lower the vehicle off the jack stands.
Conclusion
Converting from drum brakes to disc brakes can improve your vehicle's performance drastically. Ensure to perform regular maintenance checks post-installation for optimal performance. With patience and attention to detail, you'll enjoy enhanced braking power on your rides. Happy driving!
-
Rear Drum Brakes Maintenance Tipsവാർത്തAug.04,2025
-
Key Components Affecting Brake Drum Functionവാർത്തAug.04,2025
-
Important Inspection for Truck Drum Brakeവാർത്തAug.04,2025
-
How to Prepare for Changing Rear Drum Brakesവാർത്തAug.04,2025
-
Essential Tools for Cleaning Drum Brakes Properlyവാർത്തAug.04,2025
-
Brake Drum Function Guideവാർത്തAug.04,2025
-
Safety Features of Red Brake Drumsവാർത്തAug.01,2025
