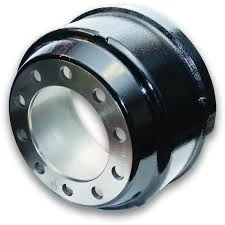
-
 Afrikaans
 -
 Albanian
 -
 Amharic
 -
 Arabic
 -
 Armenian
 -
 Azerbaijani
 -
 Basque
 -
 Belarusian
 -
 Bengali
 -
 Bosnian
 -
 Bulgarian
 -
 Catalan
 -
 Cebuano
 -
 Corsican
 -
 Croatian
 -
 Czech
Czech -
 Danish
 -
 Dutch
Dutch -
 English
 -
 Esperanto
 -
 Estonian
 -
 Finnish
 -
 French
 -
 Frisian
 -
 Galician
 -
 Georgian
 -
 German
 -
 Greek
Greek -
 Gujarati
 -
 Haitian Creole
 -
 hausa
hausa -
 hawaiian
 -
 Hebrew
 -
 Hindi
Hindi -
 Miao
Miao -
 Hungarian
 -
 Icelandic
 -
 igbo
igbo -
 Indonesian
 -
 irish
irish -
 Italian
 -
 Japanese
 -
 Javanese
 -
 Kannada
 -
 kazakh
 -
 Khmer
Khmer -
 Rwandese
 -
 Korean
 -
 Kurdish
 -
 Kyrgyz
 -
 Lao
Lao -
 Latin
Latin -
 Latvian
 -
 Lithuanian
 -
 Luxembourgish
 -
 Macedonian
 -
 Malgashi
 -
 Malay
Malay -
 Malayalam
 -
 Maltese
 -
 Maori
Maori -
 Marathi
 -
 Mongolian
 -
 Myanmar
 -
 Nepali
 -
 Norwegian
 -
 Norwegian
 -
 Occitan
 -
 Pashto
 -
 Persian
 -
 Polish
 -
 Portuguese
 -
 Punjabi
 -
 Romanian
 -
 Russian
 -
 Samoan
 -
 Scottish Gaelic
 -
 Serbian
 -
 Sesotho
 -
 Shona
Shona -
 Sindhi
 -
 Sinhala
 -
 Slovak
 -
 Slovenian
 -
 Somali
 -
 Spanish
 -
 Sundanese
 -
 Swahili
 -
 Swedish
 -
 Tagalog
 -
 Tajik
Tajik -
 Tamil
Tamil -
 Tatar
Tatar -
 Telugu
 -
 Thai
Thai -
 Turkish
 -
 Turkmen
 -
 Ukrainian
 -
 Urdu
Urdu -
 Uighur
 -
 Uzbek
Uzbek -
 Vietnamese
 -
 Welsh
Welsh -
 Bantu
Bantu -
 Yiddish
 -
 Yoruba
 -
 Zulu
Zulu
do drum brakes need to be bled
Do Drum Brakes Need to Be Bled?
When it comes to vehicle maintenance, many car owners may overlook the complexity involved in the braking system. Among the various components of this critical system, drum brakes have a unique design and functionality that is essential for effective stopping power. One common question regarding drum brakes is whether or not they need to be bled. In this article, we will explore the purpose of bleeding brakes, the specific considerations for drum brakes, and best practices for ensuring your braking system operates smoothly.
Understanding Brake Bleeding
Bleeding brakes is a process that removes air bubbles from the brake lines, ensuring that brake fluid can effectively transmit force to the brake components when you press the brake pedal. Air in the brake lines can lead to a spongy brake pedal feel and reduced braking efficiency, which can significantly affect vehicle safety.
Do Drum Brakes Need to Be Bled?
Yes, drum brakes, like disc brakes, can also require bleeding, especially after certain maintenance activities. Here are some scenarios where bleeding might be necessary
1. Brake Fluid Change When the brake fluid is changed, old fluid is drained from the system, and fresh fluid is added. Air can enter the brake line during this process, necessitating bleeding.
2. Brake Component Replacement If you replace any components in the braking system, such as the wheel cylinders or the brake master cylinder, bleeding should be performed to ensure no air is trapped inside the system.
3. Routine Maintenance If you notice a spongy brake pedal or decreased braking performance, bleeding the brakes may help eliminate air in the system.
Bleeding Drum Brakes
Bleeding drum brakes is a bit different from bleeding disc brakes
. Here’s a step-by-step guidedo drum brakes need to be bled

1. Gather Your Tools You will typically need a brake bleeder kit, which includes a wrench and a collection bottle to catch old brake fluid.
2. Locate the Wheel Cylinder Each drum brake has a wheel cylinder behind the drum, responsible for expanding the brake shoes when the brakes are applied.
3. Prepare the Vehicle Loosen the lug nuts on the wheel where you're bleeding the brakes, lift the vehicle with a jack, and remove the wheel.
4. Locate the Bleeder Valve The bleeder valve is a small screw found on the wheel cylinder. It often has a rubber cap; remove this cap first.
5. Attach the Bleeder Kit Connect the clear hose from your bleeder kit to the bleeder valve, ensuring the other end of the hose is in the collection bottle.
6. Bleeding Process Have an assistant pump the brake pedal several times and hold it down. Open the bleeder valve to let the fluid and any trapped air escape. Close the valve before your assistant releases the brake pedal. Repeat this process until you see a steady stream of fluid without bubbles.
7. Check Brake Fluid Levels Throughout this process, keep an eye on the brake fluid reservoir. Fill it as necessary to prevent introducing more air into the system.
8. Reassemble Everything Once finished, replace the rubber cap on the bleeder valve, reattach the wheel, and tighten the lug nuts.
Conclusion
Maintaining an effective braking system is critical for vehicle safety, and understanding the need to bleed drum brakes is an important part of that maintenance. Whether you’re changing brake fluid, replacing components, or performing routine checks, being proactive in your brake maintenance can prevent potential issues and ensure a safe driving experience. If you're unsure about the process, consider consulting a professional mechanic to ensure that your braking system remains in top shape.
-
What Are Drum BrakesNewsJul.07,2025
-
Understanding Brake Drum MaterialNewsJul.07,2025
-
Semi-Trailer Brake Drum: A Key Component for Extreme Loads and Long-Distance TransportNewsJul.07,2025
-
Drum Brake Pads for SaleNewsJul.07,2025
-
Brake Drums for SaleNewsJul.07,2025
-
Brake Drum ManufacturerNewsJul.07,2025
-
Aluminum Brake Drums: The Future of High-Performance CarsNewsJul.07,2025
