-
 Afrikaans
 -
 Albanian
 -
 Amharic
 -
 Arabic
 -
 Armenian
 -
 Azerbaijani
 -
 Basque
 -
 Belarusian
 -
 Bengali
 -
 Bosnian
 -
 Bulgarian
 -
 Catalan
 -
 Cebuano
 -
 Corsican
 -
 Croatian
 -
 Czech
Czech -
 Danish
 -
 Dutch
Dutch -
 English
 -
 Esperanto
 -
 Estonian
 -
 Finnish
 -
 French
 -
 Frisian
 -
 Galician
 -
 Georgian
 -
 German
 -
 Greek
Greek -
 Gujarati
 -
 Haitian Creole
 -
 hausa
hausa -
 hawaiian
 -
 Hebrew
 -
 Hindi
Hindi -
 Miao
Miao -
 Hungarian
 -
 Icelandic
 -
 igbo
igbo -
 Indonesian
 -
 irish
irish -
 Italian
 -
 Japanese
 -
 Javanese
 -
 Kannada
 -
 kazakh
 -
 Khmer
Khmer -
 Rwandese
 -
 Korean
 -
 Kurdish
 -
 Kyrgyz
 -
 Lao
Lao -
 Latin
Latin -
 Latvian
 -
 Lithuanian
 -
 Luxembourgish
 -
 Macedonian
 -
 Malgashi
 -
 Malay
Malay -
 Malayalam
 -
 Maltese
 -
 Maori
Maori -
 Marathi
 -
 Mongolian
 -
 Myanmar
 -
 Nepali
 -
 Norwegian
 -
 Norwegian
 -
 Occitan
 -
 Pashto
 -
 Persian
 -
 Polish
 -
 Portuguese
 -
 Punjabi
 -
 Romanian
 -
 Russian
 -
 Samoan
 -
 Scottish Gaelic
 -
 Serbian
 -
 Sesotho
 -
 Shona
Shona -
 Sindhi
 -
 Sinhala
 -
 Slovak
 -
 Slovenian
 -
 Somali
 -
 Spanish
 -
 Sundanese
 -
 Swahili
 -
 Swedish
 -
 Tagalog
 -
 Tajik
Tajik -
 Tamil
Tamil -
 Tatar
Tatar -
 Telugu
 -
 Thai
Thai -
 Turkish
 -
 Turkmen
 -
 Ukrainian
 -
 Urdu
Urdu -
 Uighur
 -
 Uzbek
Uzbek -
 Vietnamese
 -
 Welsh
Welsh -
 Bantu
Bantu -
 Yiddish
 -
 Yoruba
 -
 Zulu
Zulu
Feb . 04, 2025 01:09
Back to list
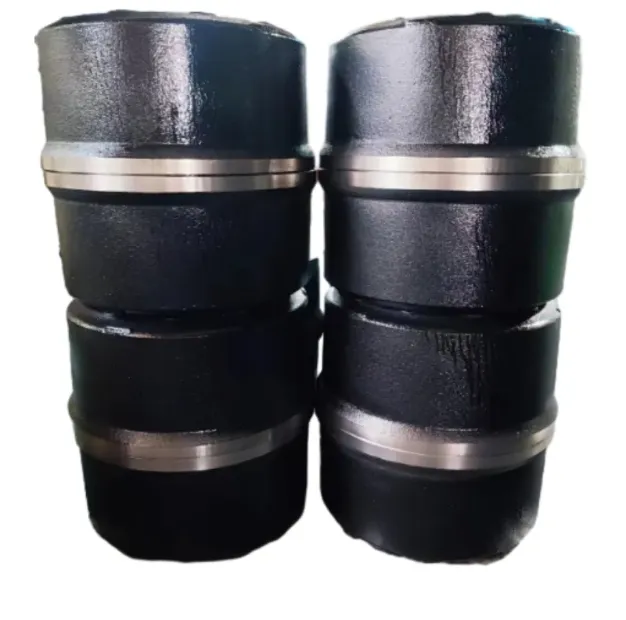
drum brake assembly instructions
Drum brakes, an essential component of many vehicles, provide reliable stopping power with a relatively simple design. Proper assembly and installation are crucial for safety and performance. For those experienced in car maintenance, installing drum brakes might seem straightforward, but precision and adherence to expert guidelines are paramount.
Position the new brake shoes, mirroring the original setup. Install the hold-down springs, ensuring they are secured. Next, attach the return springs, which keep the shoes in the correct position. This step can be challenging; using a dedicated brake spring tool will make it easier and safer. After fitting the springs, adjust the star wheel adjuster. This component maintains the proper distance between the shoes and the drum. Proper adjustment is crucial for optimal braking performance, preventing premature wear of brake shoes. With the shoes and springs installed, replace the brake drum. Ensure it fits snugly but can rotate with slight resistance. If the drum cannot be mounted easily, recheck the adjuster and shoe positioning. Misalignment can cause issues during operation. Once the drum is correctly in place, reinstall the wheel, tightening the lug nuts in a crisscross pattern for even pressure distribution. Lower the vehicle to the ground and perform a brake test in a safe area. Listen for unusual noises and check for consistent brake pedal pressure. Throughout this process, ensure all components are in pristine condition and free from any contaminants. Contaminated brake linings can lead to reduced braking efficiency and present a safety hazard. In sum, while drum brake assembly might seem daunting, it can be manageable with careful attention to detail and adherence to professional guidelines. Always prioritize safety and accuracy, leveraging expert advice and automotive resources when necessary. Properly installed drum brakes ensure vehicle reliability and driver safety, underscoring the importance of following these meticulous instructions.


Position the new brake shoes, mirroring the original setup. Install the hold-down springs, ensuring they are secured. Next, attach the return springs, which keep the shoes in the correct position. This step can be challenging; using a dedicated brake spring tool will make it easier and safer. After fitting the springs, adjust the star wheel adjuster. This component maintains the proper distance between the shoes and the drum. Proper adjustment is crucial for optimal braking performance, preventing premature wear of brake shoes. With the shoes and springs installed, replace the brake drum. Ensure it fits snugly but can rotate with slight resistance. If the drum cannot be mounted easily, recheck the adjuster and shoe positioning. Misalignment can cause issues during operation. Once the drum is correctly in place, reinstall the wheel, tightening the lug nuts in a crisscross pattern for even pressure distribution. Lower the vehicle to the ground and perform a brake test in a safe area. Listen for unusual noises and check for consistent brake pedal pressure. Throughout this process, ensure all components are in pristine condition and free from any contaminants. Contaminated brake linings can lead to reduced braking efficiency and present a safety hazard. In sum, while drum brake assembly might seem daunting, it can be manageable with careful attention to detail and adherence to professional guidelines. Always prioritize safety and accuracy, leveraging expert advice and automotive resources when necessary. Properly installed drum brakes ensure vehicle reliability and driver safety, underscoring the importance of following these meticulous instructions.
Prev:
Latest news
-
What Are Drum BrakesNewsJul.07,2025
-
Understanding Brake Drum MaterialNewsJul.07,2025
-
Semi-Trailer Brake Drum: A Key Component for Extreme Loads and Long-Distance TransportNewsJul.07,2025
-
Drum Brake Pads for SaleNewsJul.07,2025
-
Brake Drums for SaleNewsJul.07,2025
-
Brake Drum ManufacturerNewsJul.07,2025
-
Aluminum Brake Drums: The Future of High-Performance CarsNewsJul.07,2025
