-
 Afrikaans
 -
 Albanian
 -
 Amharic
 -
 Arabic
 -
 Armenian
 -
 Azerbaijani
 -
 Basque
 -
 Belarusian
 -
 Bengali
 -
 Bosnian
 -
 Bulgarian
 -
 Catalan
 -
 Cebuano
 -
 Corsican
 -
 Croatian
 -
 Czech
Czech -
 Danish
 -
 Dutch
Dutch -
 English
 -
 Esperanto
 -
 Estonian
 -
 Finnish
 -
 French
 -
 Frisian
 -
 Galician
 -
 Georgian
 -
 German
 -
 Greek
Greek -
 Gujarati
 -
 Haitian Creole
 -
 hausa
hausa -
 hawaiian
 -
 Hebrew
 -
 Hindi
Hindi -
 Miao
Miao -
 Hungarian
 -
 Icelandic
 -
 igbo
igbo -
 Indonesian
 -
 irish
irish -
 Italian
 -
 Japanese
 -
 Javanese
 -
 Kannada
 -
 kazakh
 -
 Khmer
Khmer -
 Rwandese
 -
 Korean
 -
 Kurdish
 -
 Kyrgyz
 -
 Lao
Lao -
 Latin
Latin -
 Latvian
 -
 Lithuanian
 -
 Luxembourgish
 -
 Macedonian
 -
 Malgashi
 -
 Malay
Malay -
 Malayalam
 -
 Maltese
 -
 Maori
Maori -
 Marathi
 -
 Mongolian
 -
 Myanmar
 -
 Nepali
 -
 Norwegian
 -
 Norwegian
 -
 Occitan
 -
 Pashto
 -
 Persian
 -
 Polish
 -
 Portuguese
 -
 Punjabi
 -
 Romanian
 -
 Russian
 -
 Samoan
 -
 Scottish Gaelic
 -
 Serbian
 -
 Sesotho
 -
 Shona
Shona -
 Sindhi
 -
 Sinhala
 -
 Slovak
 -
 Slovenian
 -
 Somali
 -
 Spanish
 -
 Sundanese
 -
 Swahili
 -
 Swedish
 -
 Tagalog
 -
 Tajik
Tajik -
 Tamil
Tamil -
 Tatar
Tatar -
 Telugu
 -
 Thai
Thai -
 Turkish
 -
 Turkmen
 -
 Ukrainian
 -
 Urdu
Urdu -
 Uighur
 -
 Uzbek
Uzbek -
 Vietnamese
 -
 Welsh
Welsh -
 Bantu
Bantu -
 Yiddish
 -
 Yoruba
 -
 Zulu
Zulu
how to change studs on drum brakes
How to Change Studs on Drum Brakes
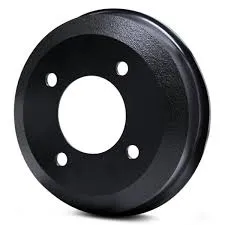
Changing studs on drum brakes is an essential maintenance task that can enhance your vehicle's safety and performance. The studs, or wheel studs, are the threaded bolts that hold the wheel in place. If they become damaged or stripped, it can lead to dangerous situations, such as losing a wheel while driving. Here’s a comprehensive guide on how to change these studs effectively.
Tools and Materials Needed
Before you begin, gather the necessary tools and materials. You’ll need
1. A jack and jack stands 2. Lug wrench 3. Socket set 4. Torque wrench 5. New wheel studs 6. Hammer 7. Screwdriver 8. Penetrating oil (optional) 9. Safety glasses and gloves
Step-by-Step Guide
1. Safety First Start by ensuring your vehicle is parked on a level surface. Engage the parking brake and wear safety glasses and gloves for protection.
2. Loosen the Lug Nuts Use the lug wrench to slightly loosen the lug nuts on the wheel where you’ll be changing the studs. Don’t remove them entirely; just break their seal.
3. Lift the Vehicle Employ the jack to lift the vehicle off the ground and support it securely with jack stands. This will allow you to work safely underneath the vehicle.
how to change studs on drum brakes

4. Remove the Wheel Take off the lug nuts completely and remove the wheel. Set it aside in a safe place.
5. Access the Brake Drum If your vehicle has a cover over the brake drum, you'll need to remove it. In most cases, you’ll need to rotate the drum to align the stud hole with the opening at the back.
6. Remove the Old Stud If the stud is broken or damaged, tap it gently with a hammer from the back of the drum to push it through. Apply penetrating oil to ease the removal process if necessary.
7. Install the New Stud Line up the new stud with the hole and insert it into the drum. Use a hammer to carefully tap it back into place, ensuring it sits evenly. Be mindful not to damage the threads.
8. Reassemble Replace the brake drum and any covers. Then, mount the wheel back onto the hub, aligning the holes with the new studs.
9. Secure the Lug Nuts Hand-tighten the lug nuts before lowering the vehicle. Once it’s back on the ground, use a torque wrench to securely tighten the lug nuts to the manufacturer’s recommended specifications.
10. Final Inspection After completing the process for all affected studs, double-check the tightness of the lug nuts. It’s wise to take the vehicle for a short drive and then re-check the nuts to ensure they are secure.
Conclusion
Changing studs on drum brakes is a manageable DIY task. By following these steps and maintaining safety, you can ensure your vehicle’s wheels are secure and ready for the road. Regular inspections and timely repairs will help you avoid costly complications in the future.
-
What Are Drum BrakesNewsJul.07,2025
-
Understanding Brake Drum MaterialNewsJul.07,2025
-
Semi-Trailer Brake Drum: A Key Component for Extreme Loads and Long-Distance TransportNewsJul.07,2025
-
Drum Brake Pads for SaleNewsJul.07,2025
-
Brake Drums for SaleNewsJul.07,2025
-
Brake Drum ManufacturerNewsJul.07,2025
-
Aluminum Brake Drums: The Future of High-Performance CarsNewsJul.07,2025
