-
 Afrikaans
 -
 Albanian
 -
 Amharic
 -
 Arabic
 -
 Armenian
 -
 Azerbaijani
 -
 Basque
 -
 Belarusian
 -
 Bengali
 -
 Bosnian
 -
 Bulgarian
 -
 Catalan
 -
 Cebuano
 -
 Corsican
 -
 Croatian
 -
 Czech
Czech -
 Danish
 -
 Dutch
Dutch -
 English
 -
 Esperanto
 -
 Estonian
 -
 Finnish
 -
 French
 -
 Frisian
 -
 Galician
 -
 Georgian
 -
 German
 -
 Greek
Greek -
 Gujarati
 -
 Haitian Creole
 -
 hausa
hausa -
 hawaiian
 -
 Hebrew
 -
 Hindi
Hindi -
 Miao
Miao -
 Hungarian
 -
 Icelandic
 -
 igbo
igbo -
 Indonesian
 -
 irish
irish -
 Italian
 -
 Japanese
 -
 Javanese
 -
 Kannada
 -
 kazakh
 -
 Khmer
Khmer -
 Rwandese
 -
 Korean
 -
 Kurdish
 -
 Kyrgyz
 -
 Lao
Lao -
 Latin
Latin -
 Latvian
 -
 Lithuanian
 -
 Luxembourgish
 -
 Macedonian
 -
 Malgashi
 -
 Malay
Malay -
 Malayalam
 -
 Maltese
 -
 Maori
Maori -
 Marathi
 -
 Mongolian
 -
 Myanmar
 -
 Nepali
 -
 Norwegian
 -
 Norwegian
 -
 Occitan
 -
 Pashto
 -
 Persian
 -
 Polish
 -
 Portuguese
 -
 Punjabi
 -
 Romanian
 -
 Russian
 -
 Samoan
 -
 Scottish Gaelic
 -
 Serbian
 -
 Sesotho
 -
 Shona
Shona -
 Sindhi
 -
 Sinhala
 -
 Slovak
 -
 Slovenian
 -
 Somali
 -
 Spanish
 -
 Sundanese
 -
 Swahili
 -
 Swedish
 -
 Tagalog
 -
 Tajik
Tajik -
 Tamil
Tamil -
 Tatar
Tatar -
 Telugu
 -
 Thai
Thai -
 Turkish
 -
 Turkmen
 -
 Ukrainian
 -
 Urdu
Urdu -
 Uighur
 -
 Uzbek
Uzbek -
 Vietnamese
 -
 Welsh
Welsh -
 Bantu
Bantu -
 Yiddish
 -
 Yoruba
 -
 Zulu
Zulu
how to install wheel lights on drum brakes
How to Install Wheel Lights on Drum Brakes
Installing wheel lights on vehicles with drum brakes can add an exciting visual element to your ride, enhancing its aesthetics and making it stand out at night. However, the installation process requires careful attention to detail and safety. Below is a step-by-step guide to help you install wheel lights on your drum brake-equipped vehicle effectively.
Materials Needed
1. Wheel lights (LED strip or other types specific for wheels) 2. Adhesive or clips (if needed for your lights) 3. Wire connectors and electrical tape 4. Drill and drill bits (if installing lights that require mounting) 5. A wrench or socket set 6. Jack and jack stands 7. Safety goggles and gloves
Step 1 Preparation
Before starting, ensure you have all your materials ready. Safety is paramount, so wear gloves and goggles to protect yourself. To begin, park your vehicle on a flat surface and engage the parking brake. Jack up the car and secure it with jack stands to prevent any accidents during installation.
Step 2 Remove the Wheel
Using a wrench or socket set, loosen the lug nuts of the wheel where you intend to install the lights. Once they are loose, remove the lug nuts completely and take the wheel off to expose the drum brake assembly.
Step 3 Choose the Light Placement
how to install wheel lights on drum brakes

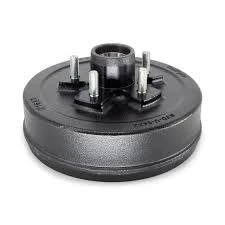
Examine the area around the drum brake to decide where to place the wheel lights. The lights should be positioned where they can highlight the wheel without interfering with any brake components. Many users opt to place the lights on the inner rim of the wheel or attach them around the brake drum itself.
Step 4 Install the Wheel Lights
If your wheel lights come with adhesive backing, clean the surface thoroughly with rubbing alcohol to ensure a strong bond. If clips or brackets are needed, drill small holes as necessary and secure them according to the light kit instructions. Attach the lights firmly, making sure they lay flat and are not at risk of being damaged by the wheel's movement.
Step 5 Wiring the Lights
Next, you need to wire the lights to the vehicle's power source. This can often be done by connecting the light’s wiring to the vehicle’s existing wiring. Ensure that you choose a circuit that activates with your vehicle's lights or a separate switch for independent control. Use wire connectors and electrical tape to secure the connections and protect them from moisture.
Step 6 Reassemble and Test
Once you’ve completed the wiring, carefully replace the wheel, tightening the lug nuts securely. Remove the jack stands and lower the vehicle back to the ground. Turn on your vehicle’s lights or the switch you installed for the wheel lights to test their functionality.
Conclusion
Adding wheel lights to drum brake-equipped vehicles is a fun project that can enhance the vehicle's visual appeal. By following these steps—taking precautions, and ensuring all connections are secure—you can successfully install wheel lights and enjoy a new look for your vehicle. Always consult your light kit's instructions for any specific requirements or tips. Happy decorating!
-
Rear Drum Brakes Maintenance TipsNewsAug.04,2025
-
Key Components Affecting Brake Drum FunctionNewsAug.04,2025
-
Important Inspection for Truck Drum BrakeNewsAug.04,2025
-
How to Prepare for Changing Rear Drum BrakesNewsAug.04,2025
-
Essential Tools for Cleaning Drum Brakes ProperlyNewsAug.04,2025
-
Brake Drum Function GuideNewsAug.04,2025
-
Safety Features of Red Brake DrumsNewsAug.01,2025
