-
 Afrikaans
 -
 Albanian
 -
 Amharic
 -
 Arabic
 -
 Armenian
 -
 Azerbaijani
 -
 Basque
 -
 Belarusian
 -
 Bengali
 -
 Bosnian
 -
 Bulgarian
 -
 Catalan
 -
 Cebuano
 -
 Corsican
 -
 Croatian
 -
 Czech
Czech -
 Danish
 -
 Dutch
Dutch -
 English
 -
 Esperanto
 -
 Estonian
 -
 Finnish
 -
 French
 -
 Frisian
 -
 Galician
 -
 Georgian
 -
 German
 -
 Greek
Greek -
 Gujarati
 -
 Haitian Creole
 -
 hausa
hausa -
 hawaiian
 -
 Hebrew
 -
 Hindi
Hindi -
 Miao
Miao -
 Hungarian
 -
 Icelandic
 -
 igbo
igbo -
 Indonesian
 -
 irish
irish -
 Italian
 -
 Japanese
 -
 Javanese
 -
 Kannada
 -
 kazakh
 -
 Khmer
Khmer -
 Rwandese
 -
 Korean
 -
 Kurdish
 -
 Kyrgyz
 -
 Lao
Lao -
 Latin
Latin -
 Latvian
 -
 Lithuanian
 -
 Luxembourgish
 -
 Macedonian
 -
 Malgashi
 -
 Malay
Malay -
 Malayalam
 -
 Maltese
 -
 Maori
Maori -
 Marathi
 -
 Mongolian
 -
 Myanmar
 -
 Nepali
 -
 Norwegian
 -
 Norwegian
 -
 Occitan
 -
 Pashto
 -
 Persian
 -
 Polish
 -
 Portuguese
 -
 Punjabi
 -
 Romanian
 -
 Russian
 -
 Samoan
 -
 Scottish Gaelic
 -
 Serbian
 -
 Sesotho
 -
 Shona
Shona -
 Sindhi
 -
 Sinhala
 -
 Slovak
 -
 Slovenian
 -
 Somali
 -
 Spanish
 -
 Sundanese
 -
 Swahili
 -
 Swedish
 -
 Tagalog
 -
 Tajik
Tajik -
 Tamil
Tamil -
 Tatar
Tatar -
 Telugu
 -
 Thai
Thai -
 Turkish
 -
 Turkmen
 -
 Ukrainian
 -
 Urdu
Urdu -
 Uighur
 -
 Uzbek
Uzbek -
 Vietnamese
 -
 Welsh
Welsh -
 Bantu
Bantu -
 Yiddish
 -
 Yoruba
 -
 Zulu
Zulu
how to replace drum brakes with disk brakes
How to Replace Drum Brakes with Disc Brakes A Step-by-Step Guide
Upgrading your vehicle's braking system from drum brakes to disc brakes can significantly improve your driving experience and safety. Disc brakes offer better heat dissipation, improved stopping power, and reduced maintenance. While the conversion process can be complex, this guide will walk you through the essential steps to successfully replace drum brakes with disc brakes.
Tools and Materials Needed
Before starting the conversion, gather the necessary tools and materials
- Socket set and ratchet - Wrench set - Screwdrivers (flathead and Phillips) - Brake line wrench - Brake cleaner - Disc brake conversion kit (specific to your vehicle) - New brake fluid - Jack and jack stands - Safety glasses and gloves
Step 1 Preparation
1. Ensure Safety Park your vehicle on a level surface, engage the parking brake, and place wheel chocks behind the rear wheels. Wear safety glasses and gloves throughout the process.
2. Lift the Vehicle Using a jack, lift the front of the vehicle and secure it with jack stands. Remove the front wheels to access the braking components.
Step 2 Remove Drum Brakes
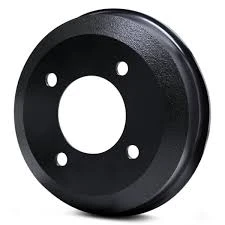
1. Take Off the Drum Remove the drum brake assembly. This typically involves unscrewing the retaining screws (if applicable) and gently pulling the drum off. You may need to tap it lightly with a hammer if it’s stuck due to rust.
2. Remove Brake Shoes and Hardware Detach the brake shoes and all associated hardware carefully, taking note of how everything is assembled for reference.
Step 3 Install Disc Brake Components
1. Install the Disc Brake Spindle Depending on your conversion kit, it might require you to replace the entire spindle. Remove the old spindle and install the new disc brake spindle according to the manufacturer’s instructions.
how to replace drum brakes with disk brakes

2. Attach the Disc Brake Rotors Slide the new disc rotors onto the wheel hub. Ensure they are seated properly.
3. Install Calipers Follow the instructions provided with your conversion kit to install the calipers. They will typically attach using bolts that secure them to the spindle.
4. Mount Brake Pads Insert the brake pads into the caliper. Most kits will include a specific type designed for your vehicle.
5. Connect Brake Lines If your kit includes new brake lines, remove the old lines using a brake line wrench and replace them with the new lines provided. Ensure all connections are tight and secure.
Step 4 Bleed the Brakes
1. Add Brake Fluid Fill the brake fluid reservoir with the appropriate type of brake fluid for your vehicle.
2. Bleed the Brakes Start by bleeding the brakes from the farthest caliper to the nearest one. This process removes any air bubbles trapped in the system. You will need an assistant to pump the brake pedal while you open and close the bleeder valve on the caliper.
Step 5 Final Checks and Reassembly
1. Reattach Wheels After bleeding the brakes, reattach the wheels and tighten the lug nuts securely.
2. Lower the Vehicle Carefully remove the jack stands and lower your vehicle.
3. Test the Brakes Before driving, pump the brake pedal a few times to establish brake pressure. Test drive your vehicle in a safe area to ensure the brakes function properly.
Conclusion
Upgrading to disc brakes can drastically improve your vehicle's stopping power and overall performance. While the process may seem daunting, with the right tools and attention to detail, you can successfully convert your drum brakes to disc brakes, ensuring a safer driving experience. Always consult your vehicle’s service manual and consider enlisting the help of a professional if you are unsure at any stage of the process.
-
What Are Drum BrakesNewsJul.07,2025
-
Understanding Brake Drum MaterialNewsJul.07,2025
-
Semi-Trailer Brake Drum: A Key Component for Extreme Loads and Long-Distance TransportNewsJul.07,2025
-
Drum Brake Pads for SaleNewsJul.07,2025
-
Brake Drums for SaleNewsJul.07,2025
-
Brake Drum ManufacturerNewsJul.07,2025
-
Aluminum Brake Drums: The Future of High-Performance CarsNewsJul.07,2025
