-
 Afrikaans
 -
 Albanian
 -
 Amharic
 -
 Arabic
 -
 Armenian
 -
 Azerbaijani
 -
 Basque
 -
 Belarusian
 -
 Bengali
 -
 Bosnian
 -
 Bulgarian
 -
 Catalan
 -
 Cebuano
 -
 Corsican
 -
 Croatian
 -
 Czech
Czech -
 Danish
 -
 Dutch
Dutch -
 English
 -
 Esperanto
 -
 Estonian
 -
 Finnish
 -
 French
 -
 Frisian
 -
 Galician
 -
 Georgian
 -
 German
 -
 Greek
Greek -
 Gujarati
 -
 Haitian Creole
 -
 hausa
hausa -
 hawaiian
 -
 Hebrew
 -
 Hindi
Hindi -
 Miao
Miao -
 Hungarian
 -
 Icelandic
 -
 igbo
igbo -
 Indonesian
 -
 irish
irish -
 Italian
 -
 Japanese
 -
 Javanese
 -
 Kannada
 -
 kazakh
 -
 Khmer
Khmer -
 Rwandese
 -
 Korean
 -
 Kurdish
 -
 Kyrgyz
 -
 Lao
Lao -
 Latin
Latin -
 Latvian
 -
 Lithuanian
 -
 Luxembourgish
 -
 Macedonian
 -
 Malgashi
 -
 Malay
Malay -
 Malayalam
 -
 Maltese
 -
 Maori
Maori -
 Marathi
 -
 Mongolian
 -
 Myanmar
 -
 Nepali
 -
 Norwegian
 -
 Norwegian
 -
 Occitan
 -
 Pashto
 -
 Persian
 -
 Polish
 -
 Portuguese
 -
 Punjabi
 -
 Romanian
 -
 Russian
 -
 Samoan
 -
 Scottish Gaelic
 -
 Serbian
 -
 Sesotho
 -
 Shona
Shona -
 Sindhi
 -
 Sinhala
 -
 Slovak
 -
 Slovenian
 -
 Somali
 -
 Spanish
 -
 Sundanese
 -
 Swahili
 -
 Swedish
 -
 Tagalog
 -
 Tajik
Tajik -
 Tamil
Tamil -
 Tatar
Tatar -
 Telugu
 -
 Thai
Thai -
 Turkish
 -
 Turkmen
 -
 Ukrainian
 -
 Urdu
Urdu -
 Uighur
 -
 Uzbek
Uzbek -
 Vietnamese
 -
 Welsh
Welsh -
 Bantu
Bantu -
 Yiddish
 -
 Yoruba
 -
 Zulu
Zulu
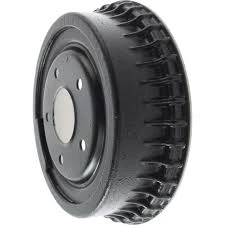
how to take off drum brake cover
How to Take Off a Drum Brake Cover
Removing a drum brake cover can be a straightforward process if you follow the right steps. Whether you’re performing maintenance, replacing brake components, or simply inspecting your vehicle, knowing the correct procedure is crucial for safety and efficiency. Below are detailed steps to help you take off a drum brake cover effectively.
Tools and Safety Precautions
Before starting, gather the necessary tools a jack, jack stands, lug wrench, a drum brake removal tool (if available), a screwdriver, and a clean rag. Ensure you’re working in a well-ventilated area and wear safety glasses and gloves to protect yourself.
Step-by-Step Guide
1. Prepare the Vehicle Park the vehicle on a flat surface and engage the parking brake. Loosen the lug nuts of the wheel where you will be removing the drum brake cover, but do not remove them completely yet.
2. Lift the Vehicle Using a jack, raise the vehicle safely. Once elevated, place jack stands underneath for additional support. Then, fully remove the lug nuts and take off the wheel to access the drum brake.
3. Inspect for Retaining Screws Examine the drum brake cover for any retaining screws or clips. Some models have these to secure the cover in place, while others may rely on friction.
how to take off drum brake cover

4. Remove the Drum Brake Cover If there are screws, use a screwdriver to remove them. In cases where a clip is present, carefully pry it off with a flathead screwdriver. If the cover appears stuck due to rust or debris, gently tap it with a rubber mallet to loosen it.
5. Check for Adjustment Drum brakes often have an adjuster that might be at fault if the drum is stuck. Adjust the star wheel to retract the brake shoes, allowing for easier removal of the drum.
6. Take Off the Drum Grip the drum cover firmly and pull it directly off the hub. If it doesn’t budge, double-check for any remaining fasteners and adjusters.
7. Inspect and Clean Once removed, take a moment to inspect the cover for signs of wear, cracks, or damage. Use a clean rag to wipe down the surface before moving on to any repairs or replacements.
8. Reassemble If you’ve completed your work on the drum brakes, reassemble the components in the reverse order. Be sure to torque all bolts to the manufacturer’s specifications for safety.
Conclusion
Taking off a drum brake cover can be a manageable task if approached with the right tools and precautions. Always prioritize safety during the process and ensure that you replace or repair any damaged parts as needed. If you encounter any difficulties or are unsure about any step, consulting a professional mechanic is advisable to guarantee safe vehicle operation. With practice, you’ll become more efficient at managing your vehicle’s brake system.
-
What Are Drum BrakesNewsJul.07,2025
-
Understanding Brake Drum MaterialNewsJul.07,2025
-
Semi-Trailer Brake Drum: A Key Component for Extreme Loads and Long-Distance TransportNewsJul.07,2025
-
Drum Brake Pads for SaleNewsJul.07,2025
-
Brake Drums for SaleNewsJul.07,2025
-
Brake Drum ManufacturerNewsJul.07,2025
-
Aluminum Brake Drums: The Future of High-Performance CarsNewsJul.07,2025
