how to adjust drum brakes on a dirt bike
How to Adjust Drum Brakes on a Dirt Bike
Drum brakes play a crucial role in ensuring the safety and performance of a dirt bike. Although many modern dirt bikes come equipped with disc brakes, some models still utilize drum brakes due to their reliability and simplicity. Adjusting drum brakes is an essential maintenance task that can enhance your bike's braking efficiency, prolong brake life, and improve overall performance. This article will guide you through the process of adjusting drum brakes on your dirt bike.
Understanding Drum Brakes
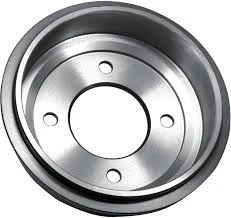
Before embarking on the adjustment process, it's important to understand how drum brakes work. Drum brakes consist of a brake drum, brake shoes, a spring, and a cam mechanism. When you pull the brake lever, the brake shoes expand against the inner surface of the drum, creating friction that slows down the wheel. Over time, the brake shoes wear down, which can lead to reduced braking performance.
Tools You'll Need
To adjust drum brakes, you will need the following tools
- Socket set - Wrench - Screwdriver - Brake cleaner - Cloth or rag
Having these tools at hand will make the process seamless and efficient.
Step-by-Step Adjustment Process
1. Safety First Before making any adjustments, ensure that your dirt bike is parked on a flat surface. Turn off the engine and allow it to cool down if it has been running.
how to adjust drum brakes on a dirt bike

2. Remove the Wheel Depending on the model of your dirt bike, you may need to remove the rear or front wheel to access the drum brakes. Use the appropriate tools to loosen and remove the axle nut, then slide the wheel off.
3. Inspect Brake Shoes Once you have access to the drum, visually inspect the brake shoes for wear. If the lining is worn down to 1/16 of an inch or less, it's time to replace them. If they appear to be in good condition, proceed to the next step.
4. Adjust the Brake Shoes Locate the adjustment mechanism either at the rear of the brake drum or on the brake lever itself. Most systems have a threaded rod or a lever to adjust the tension of the brake shoes. Turn the adjustment screw clockwise to tighten or counterclockwise to loosen. Aim for a slight drag when the brake lever is pulled, meaning the shoes are coming into contact with the drum but not excessively rubbing.
5. Check the Alignment Ensure that the brake shoes are aligned properly within the drum. Misalignment can lead to uneven wear and decreased performance. Adjust as necessary by loosening the screws and repositioning the shoes.
6. Reassemble the Wheel After adjusting the brakes, slide the wheel back onto the axle and secure it with the axle nut. Make sure it is tightened to the manufacturer’s specifications.
7. Test the Brakes Before hitting the trails, it’s vital to test the brakes. Gradually engage the brake lever while the bike is stationary to ensure proper function. If the bike stops smoothly without any strange noises, your adjustment is successful.
8. Final Checks Recheck the tightness of the wheel and ensure that all components are secure. Additionally, clean any excess brake dust or debris from the brake drum and shoes to maintain good performance.
Conclusion
Regular maintenance of your dirt bike's brakes is essential for safety and optimal performance. Adjusting drum brakes is a straightforward process that can significantly enhance your riding experience. By following the steps outlined above, you can ensure that your drum brakes are in excellent working condition, allowing you to focus on enjoying your ride. Remember, if you feel unsure about any part of the process, consult the owner's manual or a professional mechanic for assistance. Safe riding!
-
Truck Drum Brake Spring Replacement ProcedureNewsAug.22,2025
-
Evolution Of Brake Drum Function Designs In Automotive HistoryNewsAug.22,2025
-
Drum Brake Motor Thermal Management SolutionsNewsAug.22,2025
-
Essential tools for brakes and drums repair jobsNewsAug.22,2025
-
Trailer Drum Brake Self-Adjusting Mechanisms ExplainedNewsAug.22,2025
-
Brake Drum Types in Vintage Auto RestorationNewsAug.22,2025
-
Rear Drum Brakes Maintenance TipsNewsAug.04,2025


