-
 Afrikaans
 -
 Albanian
 -
 Amharic
 -
 Arabic
 -
 Armenian
 -
 Azerbaijani
 -
 Basque
 -
 Belarusian
 -
 Bengali
 -
 Bosnian
 -
 Bulgarian
 -
 Catalan
 -
 Cebuano
 -
 Corsican
 -
 Croatian
 -
 Czech
Czech -
 Danish
 -
 Dutch
Dutch -
 English
 -
 Esperanto
 -
 Estonian
 -
 Finnish
 -
 French
 -
 Frisian
 -
 Galician
 -
 Georgian
 -
 German
 -
 Greek
Greek -
 Gujarati
 -
 Haitian Creole
 -
 hausa
hausa -
 hawaiian
 -
 Hebrew
 -
 Hindi
Hindi -
 Miao
Miao -
 Hungarian
 -
 Icelandic
 -
 igbo
igbo -
 Indonesian
 -
 irish
irish -
 Italian
 -
 Japanese
 -
 Javanese
 -
 Kannada
 -
 kazakh
 -
 Khmer
Khmer -
 Rwandese
 -
 Korean
 -
 Kurdish
 -
 Kyrgyz
 -
 Lao
Lao -
 Latin
Latin -
 Latvian
 -
 Lithuanian
 -
 Luxembourgish
 -
 Macedonian
 -
 Malgashi
 -
 Malay
Malay -
 Malayalam
 -
 Maltese
 -
 Maori
Maori -
 Marathi
 -
 Mongolian
 -
 Myanmar
 -
 Nepali
 -
 Norwegian
 -
 Norwegian
 -
 Occitan
 -
 Pashto
 -
 Persian
 -
 Polish
 -
 Portuguese
 -
 Punjabi
 -
 Romanian
 -
 Russian
 -
 Samoan
 -
 Scottish Gaelic
 -
 Serbian
 -
 Sesotho
 -
 Shona
Shona -
 Sindhi
 -
 Sinhala
 -
 Slovak
 -
 Slovenian
 -
 Somali
 -
 Spanish
 -
 Sundanese
 -
 Swahili
 -
 Swedish
 -
 Tagalog
 -
 Tajik
Tajik -
 Tamil
Tamil -
 Tatar
Tatar -
 Telugu
 -
 Thai
Thai -
 Turkish
 -
 Turkmen
 -
 Ukrainian
 -
 Urdu
Urdu -
 Uighur
 -
 Uzbek
Uzbek -
 Vietnamese
 -
 Welsh
Welsh -
 Bantu
Bantu -
 Yiddish
 -
 Yoruba
 -
 Zulu
Zulu
how to break in drum brakes
How to Break in Drum Brakes A Step-by-Step Guide
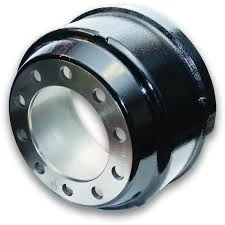
Breaking in drum brakes is a crucial process that can significantly enhance their performance and longevity. Properly seating the brake shoes against the drum ensures optimal contact and minimizes the chances of noise and wear. Here’s a step-by-step guide on how to effectively break in new drum brakes.
1. Preparation
Before you begin, ensure that your vehicle is parked on a flat, stable surface. Engage the parking brake for added safety. Gather necessary tools such as a jack, jack stands, and a lug wrench if you need to access the drum brakes.
2. Installation (if applicable)
If you are installing new drum brakes, follow the manufacturer’s guidelines for installation. Ensure that all components, including the brake shoes, springs, and adjusters, are positioned correctly. After installation, check that the brake drum rotates freely before proceeding to the next step.
3. Initial Brake Test
Once the brakes are installed, it is important to perform a soft brake test. This involves driving your vehicle at a low speed (around 25 mph) and lightly applying the brakes. Do this several times to allow the shoes to start conforming to the drum’s surface. Ensure this is done in a safe, open area to avoid any potential accidents.
4. Performing the Break-In Process
how to break in drum brakes

Now, it's time to perform the brake-in procedure. Drive the vehicle at a moderate speed (approximately 30-40 mph) and apply the brakes firmly, but not to the point of locking them up. Aim for deceleration rather than a complete stop. Do this 6-10 times, allowing a cooling period between each application to prevent overheating.
The key is to gradually increase the intensity of your braking. Each braking action should be a bit firmer than the last. This process helps evenly distribute the brake shoe material onto the drum, creating a better bond and enhancing overall performance.
5. Cooling Period
After the initial break-in, give the brakes some time to cool down. Allow at least 15-30 minutes of driving without using the brakes if possible. This helps to dissipate heat and prevents any potential glazing of the brake shoes.
6. Final Checks
Once the break-in process is complete, conduct a final inspection. Listen for any unusual noises while driving, and check for proper pedal feel. If you notice any issues, it may be a sign that adjustment is necessary.
Conclusion
Breaking in your drum brakes properly is essential for achieving optimal performance and longevity. Adhering to these steps can help ensure that your brakes operate smoothly and effectively, providing the safety and reliability you need while driving. Always consult your vehicle’s manual for any specific instructions or recommendations regarding the brake break-in process.
-
What Are Drum BrakesNewsJul.07,2025
-
Understanding Brake Drum MaterialNewsJul.07,2025
-
Semi-Trailer Brake Drum: A Key Component for Extreme Loads and Long-Distance TransportNewsJul.07,2025
-
Drum Brake Pads for SaleNewsJul.07,2025
-
Brake Drums for SaleNewsJul.07,2025
-
Brake Drum ManufacturerNewsJul.07,2025
-
Aluminum Brake Drums: The Future of High-Performance CarsNewsJul.07,2025
