-
 Afrikaans
 -
 Albanian
 -
 Amharic
 -
 Arabic
 -
 Armenian
 -
 Azerbaijani
 -
 Basque
 -
 Belarusian
 -
 Bengali
 -
 Bosnian
 -
 Bulgarian
 -
 Catalan
 -
 Cebuano
 -
 Corsican
 -
 Croatian
 -
 Czech
Czech -
 Danish
 -
 Dutch
Dutch -
 English
 -
 Esperanto
 -
 Estonian
 -
 Finnish
 -
 French
 -
 Frisian
 -
 Galician
 -
 Georgian
 -
 German
 -
 Greek
Greek -
 Gujarati
 -
 Haitian Creole
 -
 hausa
hausa -
 hawaiian
 -
 Hebrew
 -
 Hindi
Hindi -
 Miao
Miao -
 Hungarian
 -
 Icelandic
 -
 igbo
igbo -
 Indonesian
 -
 irish
irish -
 Italian
 -
 Japanese
 -
 Javanese
 -
 Kannada
 -
 kazakh
 -
 Khmer
Khmer -
 Rwandese
 -
 Korean
 -
 Kurdish
 -
 Kyrgyz
 -
 Lao
Lao -
 Latin
Latin -
 Latvian
 -
 Lithuanian
 -
 Luxembourgish
 -
 Macedonian
 -
 Malgashi
 -
 Malay
Malay -
 Malayalam
 -
 Maltese
 -
 Maori
Maori -
 Marathi
 -
 Mongolian
 -
 Myanmar
 -
 Nepali
 -
 Norwegian
 -
 Norwegian
 -
 Occitan
 -
 Pashto
 -
 Persian
 -
 Polish
 -
 Portuguese
 -
 Punjabi
 -
 Romanian
 -
 Russian
 -
 Samoan
 -
 Scottish Gaelic
 -
 Serbian
 -
 Sesotho
 -
 Shona
Shona -
 Sindhi
 -
 Sinhala
 -
 Slovak
 -
 Slovenian
 -
 Somali
 -
 Spanish
 -
 Sundanese
 -
 Swahili
 -
 Swedish
 -
 Tagalog
 -
 Tajik
Tajik -
 Tamil
Tamil -
 Tatar
Tatar -
 Telugu
 -
 Thai
Thai -
 Turkish
 -
 Turkmen
 -
 Ukrainian
 -
 Urdu
Urdu -
 Uighur
 -
 Uzbek
Uzbek -
 Vietnamese
 -
 Welsh
Welsh -
 Bantu
Bantu -
 Yiddish
 -
 Yoruba
 -
 Zulu
Zulu
Guide to Measuring Brake Drum Thickness for Safety and Performance Checks
How to Check Brake Drum Thickness
When it comes to vehicle safety, one of the critical components is the braking system. Brake drums play a vital role in ensuring that your vehicle can stop efficiently and effectively. Over time, these drums can wear down, leading to decreased performance and safety hazards. Therefore, it's essential to know how to check the thickness of your brake drums to maintain optimal brake function. Here’s a step-by-step guide to help you through the process.
Tools Needed
Before you start, gather the necessary tools. You will need
1. A caliper gauge or micrometer This tool is used to measure the thickness of the brake drum accurately. 2. A jack and jack stands To lift the vehicle safely and provide access to the wheels. 3. Lug wrench For removing the wheel. 4. Safety glasses To protect your eyes while working.
Step 1 Prepare Your Vehicle
Safety should always come first. Park your vehicle on a flat, stable surface and engage the parking brake to prevent any movement. If you're working in a garage, make sure to turn off the engine and remove the keys. Once ready, use a lug wrench to loosen the lug nuts on the wheel covering the brake drum while the vehicle is still on the ground.
Step 2 Lift the Vehicle
Using the jack, lift the vehicle and place it securely on jack stands. Never work under a vehicle supported only by a jack, as this can be extremely dangerous. Make sure the vehicle is stable before proceeding further.
Step 3 Remove the Wheel
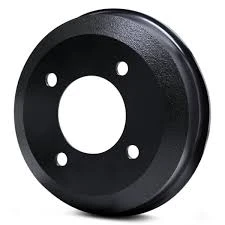
how to check brake drum thickness

Now that your vehicle is securely lifted, remove the lug nuts and take off the wheel, exposing the brake drum. Check for any visible signs of wear or damage, such as cracks or deep grooves, which may indicate the need for replacement regardless of thickness.
Step 4 Measure the Brake Drum Thickness
With the brake drum exposed, take your caliper gauge or micrometer and measure the thickness of the drum at several points around its circumference. This is crucial as brake drums can wear unevenly. The manufacturer of your vehicle typically specifies the minimum thickness for the brake drum, which can be found in the owner's manual or repair guide.
Make sure to take multiple measurements since drum wear can be uneven. Record your measurements and compare them to the specifications provided by the manufacturer.
Step 5 Check for Scoring or Cracking
While measuring the thickness, also inspect the surface of the drum for any scoring or cracking. Even if the thickness is within tolerable limits, significant surface damage can warrant a replacement.
Step 6 Reinstall Components
If the brake drum is still within the recommended thickness and is in good condition, you can reinstall the wheel. First, place the wheel back onto the hub, tighten the lug nuts slightly by hand, and then replace the wheel. Lower the vehicle from the jack stands, and then use the lug wrench to tighten the lug nuts to the manufacturer's specifications in a star pattern to ensure even tightness.
Conclusion
Checking the brake drum thickness is a straightforward task that can significantly contribute to your vehicle's safety. Regular inspections can help catch issues before they become serious problems, ensuring that your vehicle remains safe on the road. If at any point you find your brake drums are below the minimum specification or showing signs of damage, it's advisable to replace them promptly. If you're unsure about the condition of your brake system, consulting with a professional mechanic is always a wise choice.
-
What Are Drum BrakesNewsJul.07,2025
-
Understanding Brake Drum MaterialNewsJul.07,2025
-
Semi-Trailer Brake Drum: A Key Component for Extreme Loads and Long-Distance TransportNewsJul.07,2025
-
Drum Brake Pads for SaleNewsJul.07,2025
-
Brake Drums for SaleNewsJul.07,2025
-
Brake Drum ManufacturerNewsJul.07,2025
-
Aluminum Brake Drums: The Future of High-Performance CarsNewsJul.07,2025
