-
 Afrikaans
 -
 Albanian
 -
 Amharic
 -
 Arabic
 -
 Armenian
 -
 Azerbaijani
 -
 Basque
 -
 Belarusian
 -
 Bengali
 -
 Bosnian
 -
 Bulgarian
 -
 Catalan
 -
 Cebuano
 -
 Corsican
 -
 Croatian
 -
 Czech
Czech -
 Danish
 -
 Dutch
Dutch -
 English
 -
 Esperanto
 -
 Estonian
 -
 Finnish
 -
 French
 -
 Frisian
 -
 Galician
 -
 Georgian
 -
 German
 -
 Greek
Greek -
 Gujarati
 -
 Haitian Creole
 -
 hausa
hausa -
 hawaiian
 -
 Hebrew
 -
 Hindi
Hindi -
 Miao
Miao -
 Hungarian
 -
 Icelandic
 -
 igbo
igbo -
 Indonesian
 -
 irish
irish -
 Italian
 -
 Japanese
 -
 Javanese
 -
 Kannada
 -
 kazakh
 -
 Khmer
Khmer -
 Rwandese
 -
 Korean
 -
 Kurdish
 -
 Kyrgyz
 -
 Lao
Lao -
 Latin
Latin -
 Latvian
 -
 Lithuanian
 -
 Luxembourgish
 -
 Macedonian
 -
 Malgashi
 -
 Malay
Malay -
 Malayalam
 -
 Maltese
 -
 Maori
Maori -
 Marathi
 -
 Mongolian
 -
 Myanmar
 -
 Nepali
 -
 Norwegian
 -
 Norwegian
 -
 Occitan
 -
 Pashto
 -
 Persian
 -
 Polish
 -
 Portuguese
 -
 Punjabi
 -
 Romanian
 -
 Russian
 -
 Samoan
 -
 Scottish Gaelic
 -
 Serbian
 -
 Sesotho
 -
 Shona
Shona -
 Sindhi
 -
 Sinhala
 -
 Slovak
 -
 Slovenian
 -
 Somali
 -
 Spanish
 -
 Sundanese
 -
 Swahili
 -
 Swedish
 -
 Tagalog
 -
 Tajik
Tajik -
 Tamil
Tamil -
 Tatar
Tatar -
 Telugu
 -
 Thai
Thai -
 Turkish
 -
 Turkmen
 -
 Ukrainian
 -
 Urdu
Urdu -
 Uighur
 -
 Uzbek
Uzbek -
 Vietnamese
 -
 Welsh
Welsh -
 Bantu
Bantu -
 Yiddish
 -
 Yoruba
 -
 Zulu
Zulu
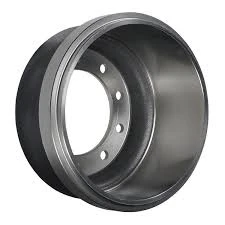
how to clean drum brakes
How to Clean Drum Brakes A Step-by-Step Guide
Maintaining your vehicle's drum brakes is essential for ensuring safety and performance. Over time, dust, debris, and moisture can accumulate in the brake drum, potentially leading to reduced efficiency and increased wear. Cleaning drum brakes is a straightforward process that can extend the life of your braking system and improve overall vehicle performance. Here’s how you can do it yourself.
Tools and Materials Needed
Before you begin, gather the necessary tools and materials - Jack and jack stands - Lug wrench - Brake cleaner spray - Wire brush or bristle brush - Clean rags or towels - Safety goggles and gloves - Screwdriver (if needed) - Torque wrench
Step 1 Safety First
Safety should always be your top priority. Before you start working on your vehicle, make sure you park it on a flat, stable surface. Engage the parking brake and wear safety gear, including goggles and gloves, to protect yourself from brake dust and chemicals.
Step 2 Lift the Vehicle
Using the lug wrench, slightly loosen the lug nuts on the wheel of the brake drum you wish to clean. Next, use the jack to lift the vehicle off the ground. Once elevated, place jack stands beneath the vehicle for added safety. After securing the vehicle, remove the lug nuts completely and take off the wheel to access the drum brake assembly.
Step 3 Inspect the Brake Components
Before cleaning, take a moment to inspect the brake components for wear and damage. Look for any cracked brake shoes, leaking wheel cylinders, or damaged springs. If you notice any issues, it’s best to replace those parts before proceeding with the cleaning.
Step 4 Remove the Brake Drum
how to clean drum brakes

Depending on your vehicle, you may need to remove retaining screws or clips securing the brake drum. Gently pull the drum away from the axle. If it’s stuck due to rust or debris, carefully tap it using a rubber mallet until it loosens.
Step 5 Clean the Drum and Shoes
Once the drum is removed, spray brake cleaner generously on both the inner surface of the drum and the brake shoes. This cleaner is specially formulated to dissolve brake dust and grime. Avoid touching the shoes with your hands, as oils from your skin can reduce their effectiveness.
Using a wire brush or bristle brush, scrub the surfaces to remove any remaining dirt and dust. Be thorough but gentle to avoid damaging the brake shoes. Wipe down everything with a clean rag, ensuring that no residue remains.
Step 6 Inspect and Reassemble
After cleaning, inspect the drum for any signs of scoring or deep grooves. If the surface appears damaged, you may need to have it resurfaced or replaced. Assuming everything looks good, align the brake drum back onto the axle. Reattach any retaining screws or clips if necessary.
Step 7 Reinstall the Wheel
Once the drum is secured, carefully place the wheel back onto the hub. Hand-tighten the lug nuts, then lower the vehicle back to the ground. After it's stable, use the torque wrench to tighten the lug nuts to the manufacturer's specifications to ensure they are secure.
Conclusion
Cleaning your drum brakes can enhance their effectiveness and longevity, ensuring safer driving conditions. While this process is manageable for most DIY enthusiasts, if you encounter any significant issues during your inspection, don’t hesitate to consult a professional mechanic. Regular maintenance not only prolongs the life of your brakes but also contributes to a smoother and more reliable driving experience. Happy driving!
-
Safety Features of Red Brake DrumsNewsAug.01,2025
-
Rear Drum Brakes Replacement for Older VehiclesNewsAug.01,2025
-
Professional Brake Drum Turning Services ExplainedNewsAug.01,2025
-
How Brake Drum and Rotor Puller WorksNewsAug.01,2025
-
Brakes and Drums CompatibilityNewsAug.01,2025
-
Anticipate Failures in Brake Drum MotorNewsAug.01,2025
-
What Are Drum BrakesNewsJul.07,2025
