-
 Afrikaans
 -
 Albanian
 -
 Amharic
 -
 Arabic
 -
 Armenian
 -
 Azerbaijani
 -
 Basque
 -
 Belarusian
 -
 Bengali
 -
 Bosnian
 -
 Bulgarian
 -
 Catalan
 -
 Cebuano
 -
 Corsican
 -
 Croatian
 -
 Czech
Czech -
 Danish
 -
 Dutch
Dutch -
 English
 -
 Esperanto
 -
 Estonian
 -
 Finnish
 -
 French
 -
 Frisian
 -
 Galician
 -
 Georgian
 -
 German
 -
 Greek
Greek -
 Gujarati
 -
 Haitian Creole
 -
 hausa
hausa -
 hawaiian
 -
 Hebrew
 -
 Hindi
Hindi -
 Miao
Miao -
 Hungarian
 -
 Icelandic
 -
 igbo
igbo -
 Indonesian
 -
 irish
irish -
 Italian
 -
 Japanese
 -
 Javanese
 -
 Kannada
 -
 kazakh
 -
 Khmer
Khmer -
 Rwandese
 -
 Korean
 -
 Kurdish
 -
 Kyrgyz
 -
 Lao
Lao -
 Latin
Latin -
 Latvian
 -
 Lithuanian
 -
 Luxembourgish
 -
 Macedonian
 -
 Malgashi
 -
 Malay
Malay -
 Malayalam
 -
 Maltese
 -
 Maori
Maori -
 Marathi
 -
 Mongolian
 -
 Myanmar
 -
 Nepali
 -
 Norwegian
 -
 Norwegian
 -
 Occitan
 -
 Pashto
 -
 Persian
 -
 Polish
 -
 Portuguese
 -
 Punjabi
 -
 Romanian
 -
 Russian
 -
 Samoan
 -
 Scottish Gaelic
 -
 Serbian
 -
 Sesotho
 -
 Shona
Shona -
 Sindhi
 -
 Sinhala
 -
 Slovak
 -
 Slovenian
 -
 Somali
 -
 Spanish
 -
 Sundanese
 -
 Swahili
 -
 Swedish
 -
 Tagalog
 -
 Tajik
Tajik -
 Tamil
Tamil -
 Tatar
Tatar -
 Telugu
 -
 Thai
Thai -
 Turkish
 -
 Turkmen
 -
 Ukrainian
 -
 Urdu
Urdu -
 Uighur
 -
 Uzbek
Uzbek -
 Vietnamese
 -
 Welsh
Welsh -
 Bantu
Bantu -
 Yiddish
 -
 Yoruba
 -
 Zulu
Zulu
how to convert drum to disc brakes
How to Convert Drum Brakes to Disc Brakes
Converting drum brakes to disc brakes is a popular modification among car enthusiasts looking to enhance their vehicle's braking performance. This transformation not only improves stopping power but also provides better heat dissipation and increased longevity of the braking system. Here’s a comprehensive guide on how to effectively convert drum brakes to disc brakes.
Understanding the Basics
Before diving into the conversion process, it’s crucial to understand the fundamental differences between drum and disc brakes. Drum brakes operate by pushing brake shoes against the inner surface of a drum, while disc brakes utilize calipers that squeeze brake pads against a disc (or rotor). The disc setup generally offers superior performance, especially under high stress, making it a preferred choice for performance vehicles.
Gather Necessary Materials
The first step in converting drum brakes to disc brakes is to gather all the necessary materials. You will need
1. Disc brake conversion kit These kits are available for various makes and models, and they usually include rotors, calipers, pads, and mounting hardware. 2. Brake lines Depending on the kit, you may need new brake lines designed for a disc setup. 3. Brake fluid Ensure you have the appropriate brake fluid for your vehicle. 4. Basic tools Socket set, wrenches, a hydraulic jack, and jack stands are essential for lifting the vehicle and removing components safely.
Step-by-Step Conversion Process
1. Preparation Begin by parking your vehicle on a flat surface, engaging the parking brake, and loosening the lug nuts of the rear wheels slightly while the vehicle is still on the ground.
2. Raise the Vehicle Use a hydraulic jack to lift the car and secure it with jack stands. Ensure the vehicle is stable before proceeding.
how to convert drum to disc brakes

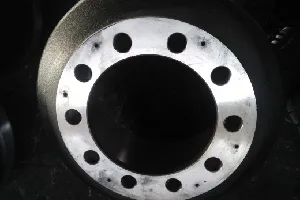
4. Disassemble the Drum Brakes Remove the brake drum by unbolting it from the axle. Be cautious, as there may be springs and other components that could snap back when removed.
5. Install the New Components - Mount the Brake Rotors Attach the new rotors to the wheel hub. Ensure they fit snugly and are secured properly. - Attach the Calipers Position the calipers over the rotors and bolt them in place according to the instructions provided with your conversion kit. Make sure to route the brake lines appropriately to avoid any kinks.
6. Connect the Brake Lines If the kit includes new brake lines, replace the old lines with the new ones, ensuring a proper fit. Make sure all connections are tight to prevent leaks.
7. Install Brake Pads Slide the new brake pads into the calipers. It is essential to follow the manufacturer’s instructions for correct installation.
8. Bleed the Brakes After everything is assembled, it’s important to bleed the brake lines to remove any air. This process is crucial for ensuring proper brake performance.
9. Final Checks Reinstall the wheels and lower the vehicle back to the ground. Tighten the lug nuts in a star pattern to ensure even torque distribution.
10. Test Drive Finally, take the car for a slow test drive to ensure everything is functioning correctly. Test the brakes gently at first to ensure they engage properly.
Conclusion
Converting from drum brakes to disc brakes is a rewarding project that can vastly improve your vehicle's braking capabilities. While it requires some mechanical knowledge and tools, the results often justify the effort. Always ensure that the conversion kit you choose is compatible with your vehicle model, and don’t hesitate to consult a professional if you’re unsure about any steps in the process. With the right approach, you’ll enjoy enhanced stopping power and a more reliable braking system.
-
What Are Drum BrakesNewsJul.07,2025
-
Understanding Brake Drum MaterialNewsJul.07,2025
-
Semi-Trailer Brake Drum: A Key Component for Extreme Loads and Long-Distance TransportNewsJul.07,2025
-
Drum Brake Pads for SaleNewsJul.07,2025
-
Brake Drums for SaleNewsJul.07,2025
-
Brake Drum ManufacturerNewsJul.07,2025
-
Aluminum Brake Drums: The Future of High-Performance CarsNewsJul.07,2025
