-
 Afrikaans
 -
 Albanian
 -
 Amharic
 -
 Arabic
 -
 Armenian
 -
 Azerbaijani
 -
 Basque
 -
 Belarusian
 -
 Bengali
 -
 Bosnian
 -
 Bulgarian
 -
 Catalan
 -
 Cebuano
 -
 Corsican
 -
 Croatian
 -
 Czech
Czech -
 Danish
 -
 Dutch
Dutch -
 English
 -
 Esperanto
 -
 Estonian
 -
 Finnish
 -
 French
 -
 Frisian
 -
 Galician
 -
 Georgian
 -
 German
 -
 Greek
Greek -
 Gujarati
 -
 Haitian Creole
 -
 hausa
hausa -
 hawaiian
 -
 Hebrew
 -
 Hindi
Hindi -
 Miao
Miao -
 Hungarian
 -
 Icelandic
 -
 igbo
igbo -
 Indonesian
 -
 irish
irish -
 Italian
 -
 Japanese
 -
 Javanese
 -
 Kannada
 -
 kazakh
 -
 Khmer
Khmer -
 Rwandese
 -
 Korean
 -
 Kurdish
 -
 Kyrgyz
 -
 Lao
Lao -
 Latin
Latin -
 Latvian
 -
 Lithuanian
 -
 Luxembourgish
 -
 Macedonian
 -
 Malgashi
 -
 Malay
Malay -
 Malayalam
 -
 Maltese
 -
 Maori
Maori -
 Marathi
 -
 Mongolian
 -
 Myanmar
 -
 Nepali
 -
 Norwegian
 -
 Norwegian
 -
 Occitan
 -
 Pashto
 -
 Persian
 -
 Polish
 -
 Portuguese
 -
 Punjabi
 -
 Romanian
 -
 Russian
 -
 Samoan
 -
 Scottish Gaelic
 -
 Serbian
 -
 Sesotho
 -
 Shona
Shona -
 Sindhi
 -
 Sinhala
 -
 Slovak
 -
 Slovenian
 -
 Somali
 -
 Spanish
 -
 Sundanese
 -
 Swahili
 -
 Swedish
 -
 Tagalog
 -
 Tajik
Tajik -
 Tamil
Tamil -
 Tatar
Tatar -
 Telugu
 -
 Thai
Thai -
 Turkish
 -
 Turkmen
 -
 Ukrainian
 -
 Urdu
Urdu -
 Uighur
 -
 Uzbek
Uzbek -
 Vietnamese
 -
 Welsh
Welsh -
 Bantu
Bantu -
 Yiddish
 -
 Yoruba
 -
 Zulu
Zulu
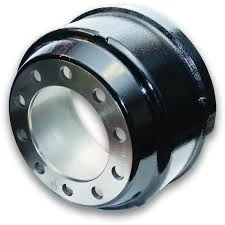
how to install wheel lights on drum brakes
How to Install Wheel Lights on Drum Brakes
Installing wheel lights on a vehicle with drum brakes can enhance your ride’s aesthetic appeal and provide added visibility at night. Whether you're making your car stand out at a car show or simply want to enjoy a unique look on the road, the following guide will help you install wheel lights effectively and safely.
Materials Needed
Before starting the installation, gather the following materials
1. Wheel lights (LED strips or pods) 2. Wire connectors 3. Electrical tape 4. A drill with appropriate drill bits 5. A wrench or socket set 6. Multimeter (optional) 7. Zip ties or adhesive clips 8. Safety goggles and gloves
Step-by-Step Installation Process
1. Preparation Start by parking your vehicle on a flat, stable surface. Ensure that the engine is off, the parking brake is engaged, and the wheels are not in motion. To avoid any electrical mishaps, disconnect the vehicle's battery.
2. Choosing the Light Type Depending on the design of your vehicle's drum brakes, choose the appropriate type of wheel lights. LED strips can be attached more flexibly, while pods can provide a focused light effect.
how to install wheel lights on drum brakes

3. Mounting the Lights Remove the wheel covers or hubcaps if necessary to access the wheel well. Use a drill to create holes for the light fixture if you're using pods. Ensure the lights are mounted where they won’t interfere with the brake components or tires. Secure the fixtures using screws or the provided adhesive.
4. Wiring the Lights Run the wires from the lights into the wheel well, keeping them away from any moving parts. If you’re unsure about wiring, consult the light's instruction manual. Use wire connectors to attach the lights to a power source. This could be a switch in the cabin or connecting directly to the vehicle's battery. Use a multimeter to verify the correct voltage if needed.
5. Safety Features Make sure to use electrical tape to insulate any exposed wires. You want to prevent short circuits that could damage the vehicle or the light system. Zip ties can help secure any loose wiring to keep it tidy and out of the way of moving components.
6. Testing the Lights Reconnect the vehicle's battery and turn on the lights to see if they function properly. Check for any flickering or dim lights and ensure that everything is securely attached.
7. Final Adjustments If everything appears to be working as expected, make any final adjustments to the light angles or positions for the best visibility and aesthetic appeal. Replace your wheel covers or hubcaps if you removed them during installation.
8. Regular Maintenance After installation, periodically check the lights to ensure they remain securely attached and functional. Clean any dirt or debris that might obstruct the lights’ brightness.
Conclusion
Installing wheel lights on drum brakes can be a fun and rewarding project for car enthusiasts. By following these steps and taking the necessary precautions, you can achieve a stunning visual upgrade that makes your vehicle truly unique. Remember always to prioritize safety, both during installation and while on the road. Happy lighting!
-
What Are Drum BrakesNewsJul.07,2025
-
Understanding Brake Drum MaterialNewsJul.07,2025
-
Semi-Trailer Brake Drum: A Key Component for Extreme Loads and Long-Distance TransportNewsJul.07,2025
-
Drum Brake Pads for SaleNewsJul.07,2025
-
Brake Drums for SaleNewsJul.07,2025
-
Brake Drum ManufacturerNewsJul.07,2025
-
Aluminum Brake Drums: The Future of High-Performance CarsNewsJul.07,2025
