-
 Afrikaans
 -
 Albanian
 -
 Amharic
 -
 Arabic
 -
 Armenian
 -
 Azerbaijani
 -
 Basque
 -
 Belarusian
 -
 Bengali
 -
 Bosnian
 -
 Bulgarian
 -
 Catalan
 -
 Cebuano
 -
 Corsican
 -
 Croatian
 -
 Czech
Czech -
 Danish
 -
 Dutch
Dutch -
 English
 -
 Esperanto
 -
 Estonian
 -
 Finnish
 -
 French
 -
 Frisian
 -
 Galician
 -
 Georgian
 -
 German
 -
 Greek
Greek -
 Gujarati
 -
 Haitian Creole
 -
 hausa
hausa -
 hawaiian
 -
 Hebrew
 -
 Hindi
Hindi -
 Miao
Miao -
 Hungarian
 -
 Icelandic
 -
 igbo
igbo -
 Indonesian
 -
 irish
irish -
 Italian
 -
 Japanese
 -
 Javanese
 -
 Kannada
 -
 kazakh
 -
 Khmer
Khmer -
 Rwandese
 -
 Korean
 -
 Kurdish
 -
 Kyrgyz
 -
 Lao
Lao -
 Latin
Latin -
 Latvian
 -
 Lithuanian
 -
 Luxembourgish
 -
 Macedonian
 -
 Malgashi
 -
 Malay
Malay -
 Malayalam
 -
 Maltese
 -
 Maori
Maori -
 Marathi
 -
 Mongolian
 -
 Myanmar
 -
 Nepali
 -
 Norwegian
 -
 Norwegian
 -
 Occitan
 -
 Pashto
 -
 Persian
 -
 Polish
 -
 Portuguese
 -
 Punjabi
 -
 Romanian
 -
 Russian
 -
 Samoan
 -
 Scottish Gaelic
 -
 Serbian
 -
 Sesotho
 -
 Shona
Shona -
 Sindhi
 -
 Sinhala
 -
 Slovak
 -
 Slovenian
 -
 Somali
 -
 Spanish
 -
 Sundanese
 -
 Swahili
 -
 Swedish
 -
 Tagalog
 -
 Tajik
Tajik -
 Tamil
Tamil -
 Tatar
Tatar -
 Telugu
 -
 Thai
Thai -
 Turkish
 -
 Turkmen
 -
 Ukrainian
 -
 Urdu
Urdu -
 Uighur
 -
 Uzbek
Uzbek -
 Vietnamese
 -
 Welsh
Welsh -
 Bantu
Bantu -
 Yiddish
 -
 Yoruba
 -
 Zulu
Zulu
Tips for Painting Brake Drums and Calipers for a Professional Finish
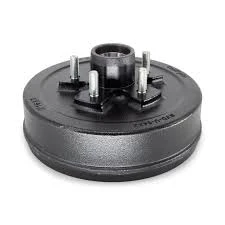
How to Paint Brake Drums and Calipers A Step-by-Step Guide
Painting brake drums and calipers is a popular way to enhance the appearance of your vehicle while protecting these critical components from rust and corrosion. This process not only adds a personal touch to your car or truck but can also prolong the life of the brake parts. Below is a detailed guide on how to properly paint your brake drums and calipers.
Materials Needed
Before you begin, gather the necessary materials
1. Brake cleaner 2. Sandpaper (various grits) 3. Masking tape 4. Plastic sheeting or newspaper 5. High-temperature brake paint (spray or brush-on) 6. Clear coat (optional) 7. Safety goggles and gloves 8. Rags or paper towels
Step 1 Preparation
Safety First Ensure your vehicle is parked on a flat surface and the engine is off. Engage the parking brake for added safety. Wear safety goggles and gloves to protect your eyes and skin.
Jack Up the Vehicle Use a jack to lift the car and secure it with jack stands. Remove the wheel to expose the brake drum or caliper.
Clean the Area Clean the brake components with brake cleaner to remove grease, dust, and dirt. This ensures proper adhesion of the paint. Wipe down with a rag and allow them to dry completely.
Step 2 Sanding
Sand the Surface Using sandpaper, gently sand the surface of the brake drum or caliper. Start with a coarser grit (around 120) to remove any rust or old paint and then follow up with a finer grit (around 320) for a smooth finish. This step is crucial as it creates a rough surface that helps the paint adhere better.
Step 3 Masking
how to paint brake drums and calipers

Mask Off Areas Use masking tape to cover any areas that you don't want to paint, such as the brake lines, rotors, and surrounding components. Make sure to use plastic sheeting or newspaper to shield other areas of the vehicle from overspray.
Step 4 Painting
Choose the Right Paint Select a high-temperature brake paint designed specifically for brake components. This type of paint can withstand the high heat generated during braking.
Apply the Paint Shake the spray can well (if using spray paint) and hold it about 6-12 inches away from the surface. Apply the paint in light, even coats to avoid drips. Generally, two to three coats will provide a solid color. If you’re using brush-on paint, apply sparingly to avoid overly thick layers.
Step 5 Clear Coat (Optional)
For added durability and a glossy finish, consider applying a clear coat once the color paint has dried completely. Follow the manufacturer's instructions regarding drying times and the number of coats.
Step 6 Drying and Reassembly
Allow to Dry Let the paint dry fully, usually for at least 24 hours. Refer to the paint can instructions for specific drying times.
Remove Masking Carefully peel off the masking tape and plastic sheeting once the paint is dry.
Reassemble the Wheel Reattach the wheel and lower the vehicle back to the ground. Make sure to follow the correct torque specifications when tightening the lug nuts.
Conclusion
Painting your brake drums and calipers is a rewarding project that yields impressive results in terms of appearance and protection. By following these steps, you can achieve a professional-looking finish that showcases your style while safeguarding your vehicle’s braking components. Remember to take your time during the preparation and painting stages for the best outcome. With a little effort, you can give your car a unique touch that stands out on the road.
-
Rear Drum Brakes Maintenance TipsNewsAug.04,2025
-
Key Components Affecting Brake Drum FunctionNewsAug.04,2025
-
Important Inspection for Truck Drum BrakeNewsAug.04,2025
-
How to Prepare for Changing Rear Drum BrakesNewsAug.04,2025
-
Essential Tools for Cleaning Drum Brakes ProperlyNewsAug.04,2025
-
Brake Drum Function GuideNewsAug.04,2025
-
Safety Features of Red Brake DrumsNewsAug.01,2025
