-
 Afrikaans
 -
 Albanian
 -
 Amharic
 -
 Arabic
 -
 Armenian
 -
 Azerbaijani
 -
 Basque
 -
 Belarusian
 -
 Bengali
 -
 Bosnian
 -
 Bulgarian
 -
 Catalan
 -
 Cebuano
 -
 Corsican
 -
 Croatian
 -
 Czech
Czech -
 Danish
 -
 Dutch
Dutch -
 English
 -
 Esperanto
 -
 Estonian
 -
 Finnish
 -
 French
 -
 Frisian
 -
 Galician
 -
 Georgian
 -
 German
 -
 Greek
Greek -
 Gujarati
 -
 Haitian Creole
 -
 hausa
hausa -
 hawaiian
 -
 Hebrew
 -
 Hindi
Hindi -
 Miao
Miao -
 Hungarian
 -
 Icelandic
 -
 igbo
igbo -
 Indonesian
 -
 irish
irish -
 Italian
 -
 Japanese
 -
 Javanese
 -
 Kannada
 -
 kazakh
 -
 Khmer
Khmer -
 Rwandese
 -
 Korean
 -
 Kurdish
 -
 Kyrgyz
 -
 Lao
Lao -
 Latin
Latin -
 Latvian
 -
 Lithuanian
 -
 Luxembourgish
 -
 Macedonian
 -
 Malgashi
 -
 Malay
Malay -
 Malayalam
 -
 Maltese
 -
 Maori
Maori -
 Marathi
 -
 Mongolian
 -
 Myanmar
 -
 Nepali
 -
 Norwegian
 -
 Norwegian
 -
 Occitan
 -
 Pashto
 -
 Persian
 -
 Polish
 -
 Portuguese
 -
 Punjabi
 -
 Romanian
 -
 Russian
 -
 Samoan
 -
 Scottish Gaelic
 -
 Serbian
 -
 Sesotho
 -
 Shona
Shona -
 Sindhi
 -
 Sinhala
 -
 Slovak
 -
 Slovenian
 -
 Somali
 -
 Spanish
 -
 Sundanese
 -
 Swahili
 -
 Swedish
 -
 Tagalog
 -
 Tajik
Tajik -
 Tamil
Tamil -
 Tatar
Tatar -
 Telugu
 -
 Thai
Thai -
 Turkish
 -
 Turkmen
 -
 Ukrainian
 -
 Urdu
Urdu -
 Uighur
 -
 Uzbek
Uzbek -
 Vietnamese
 -
 Welsh
Welsh -
 Bantu
Bantu -
 Yiddish
 -
 Yoruba
 -
 Zulu
Zulu
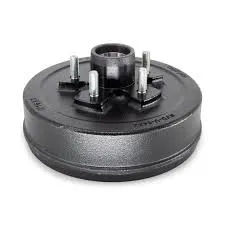
how to remove rear brake drum
How to Remove Rear Brake Drum A Step-by-Step Guide
Removing a rear brake drum may seem like a daunting task, but with the right tools and a bit of patience, it can be accomplished by any DIY enthusiast. This process is essential for performing brake maintenance, replacing shoes, or inspecting brake components. Here’s a step-by-step guide to help you safely and effectively remove the rear brake drum.
Tools and Materials Needed
Before you start, gather the necessary tools which include - Jack and jack stands - Lug wrench - Brake drum puller (optional) - Screwdriver - C-Clamp - Cleaning brush - Brake cleaner
Step 1 Prepare the Vehicle
1. Safety First Always wear safety goggles and gloves before starting any automotive task. 2. Park on Level Ground Park the vehicle on a flat surface and engage the parking brake. 3. Loosen Lug Nuts Use the lug wrench to slightly loosen the lug nuts on the rear wheel that you will be working on, but do not remove them yet.
Step 2 Lift the Vehicle
1. Jack Up the Car Using a jack, lift the vehicle and support it securely with jack stands. Ensure the vehicle is stable before proceeding. 2. Remove the Wheel Finish removing the lug nuts and take off the wheel to expose the brake drum.
how to remove rear brake drum

Step 3 Inspect the Brake Assembly
With the wheel removed, take a moment to inspect the brake components. Look for signs of wear or damage, which could indicate other issues that may need to be addressed.
Step 4 Remove the Brake Drum
1. Check for Retaining Screws Some brake drums are secured with retaining screws. If your drum has them, use a screwdriver to remove them. 2. Release Brake Tension Use a C-clamp to compress the brake shoes slightly. This might help in loosening the drum if it’s stuck. 3. Pull the Drum If the drum doesn’t come off easily, gently tap around the drum’s edge with a hammer to free it. If it’s still stubborn, a brake drum puller can be employed for additional leverage.
Step 5 Clean and Inspect
Once the drum is removed, clean the surface with a brush and brake cleaner. Inspect the internal components for wear, and check the surface of the drum for scoring or cracks.
Conclusion
With the rear brake drum successfully removed, you can now proceed with your maintenance or repair tasks. Always remember to follow the manufacturer’s guidelines for any specific procedures related to your vehicle model. After you’re done, reassemble everything correctly and take a test drive to ensure that everything functions smoothly. Regular brake maintenance can significantly enhance the safety and performance of your vehicle.
-
What Are Drum BrakesNewsJul.07,2025
-
Understanding Brake Drum MaterialNewsJul.07,2025
-
Semi-Trailer Brake Drum: A Key Component for Extreme Loads and Long-Distance TransportNewsJul.07,2025
-
Drum Brake Pads for SaleNewsJul.07,2025
-
Brake Drums for SaleNewsJul.07,2025
-
Brake Drum ManufacturerNewsJul.07,2025
-
Aluminum Brake Drums: The Future of High-Performance CarsNewsJul.07,2025
