-
 Afrikaans
 -
 Albanian
 -
 Amharic
 -
 Arabic
 -
 Armenian
 -
 Azerbaijani
 -
 Basque
 -
 Belarusian
 -
 Bengali
 -
 Bosnian
 -
 Bulgarian
 -
 Catalan
 -
 Cebuano
 -
 Corsican
 -
 Croatian
 -
 Czech
Czech -
 Danish
 -
 Dutch
Dutch -
 English
 -
 Esperanto
 -
 Estonian
 -
 Finnish
 -
 French
 -
 Frisian
 -
 Galician
 -
 Georgian
 -
 German
 -
 Greek
Greek -
 Gujarati
 -
 Haitian Creole
 -
 hausa
hausa -
 hawaiian
 -
 Hebrew
 -
 Hindi
Hindi -
 Miao
Miao -
 Hungarian
 -
 Icelandic
 -
 igbo
igbo -
 Indonesian
 -
 irish
irish -
 Italian
 -
 Japanese
 -
 Javanese
 -
 Kannada
 -
 kazakh
 -
 Khmer
Khmer -
 Rwandese
 -
 Korean
 -
 Kurdish
 -
 Kyrgyz
 -
 Lao
Lao -
 Latin
Latin -
 Latvian
 -
 Lithuanian
 -
 Luxembourgish
 -
 Macedonian
 -
 Malgashi
 -
 Malay
Malay -
 Malayalam
 -
 Maltese
 -
 Maori
Maori -
 Marathi
 -
 Mongolian
 -
 Myanmar
 -
 Nepali
 -
 Norwegian
 -
 Norwegian
 -
 Occitan
 -
 Pashto
 -
 Persian
 -
 Polish
 -
 Portuguese
 -
 Punjabi
 -
 Romanian
 -
 Russian
 -
 Samoan
 -
 Scottish Gaelic
 -
 Serbian
 -
 Sesotho
 -
 Shona
Shona -
 Sindhi
 -
 Sinhala
 -
 Slovak
 -
 Slovenian
 -
 Somali
 -
 Spanish
 -
 Sundanese
 -
 Swahili
 -
 Swedish
 -
 Tagalog
 -
 Tajik
Tajik -
 Tamil
Tamil -
 Tatar
Tatar -
 Telugu
 -
 Thai
Thai -
 Turkish
 -
 Turkmen
 -
 Ukrainian
 -
 Urdu
Urdu -
 Uighur
 -
 Uzbek
Uzbek -
 Vietnamese
 -
 Welsh
Welsh -
 Bantu
Bantu -
 Yiddish
 -
 Yoruba
 -
 Zulu
Zulu
Tips for Effectively Using Drum Brake Repair Tools
How to Use Drum Brake Tools A Comprehensive Guide
Drum brakes are a crucial component in many vehicles, providing reliable braking power and safety. When maintaining or replacing drum brakes, having the right tools and knowing how to use them are essential. In this guide, we will walk you through the key tools for drum brake work and instructions on using them effectively.
Essential Tools for Drum Brake Maintenance
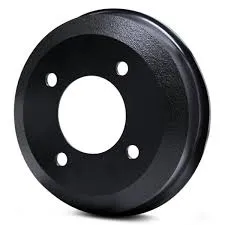
1. Brake Drum Puller This tool is designed to remove the brake drum from the wheel hub. It evenly applies pressure to pull the drum off without damaging it.
2. Brake Spring Tool This tool helps in the installation and removal of the brake springs. It prevents finger injuries and allows for easier handling of the spring tension.
3. Brake Adjusting Tool Used to adjust the brake shoes' distance from the drum, ensuring optimal contact for effective braking.
4. Ratcheting Wrench Useful for loosening and tightening nuts and bolts that secure the drum components.
5. Brake Cleaner Essential for cleaning the brake components, ensuring that dust and grime do not affect performance.
6. Safety Equipment Always wear safety glasses and gloves to protect yourself during the brake maintenance process.
Step-by-Step Guide to Using Drum Brake Tools
Step 1 Prepare Your Workspace
Ensure you have a clean and well-lit workspace. Gather all necessary tools and safety equipment before beginning the job. Place the car on a level surface and engage the parking brake.
Step 2 Remove the Wheel
Using a lug wrench, loosen and remove the lug nuts on the wheel covering the drum brake. Then, lift the vehicle using a jack and secure it with jack stands. Remove the wheel to expose the drum brake assembly.
how to use drum brake tools

Step 3 Remove the Brake Drum
Utilize the brake drum puller to loosen the drum. Attach the puller’s arms to the drum and use the center bolt to apply even pressure. Turn the bolt clockwise while ensuring the arms are securely positioned. As the bolt turns, it will gently pull the drum off the hub.
Step 4 Inspect Brake Components
Once the drum is removed, inspect the brake shoes, springs, and wheel cylinder for any signs of wear or damage. If any components are worn out, replace them before proceeding.
Step 5 Adjusting Brake Shoes
Using the brake adjusting tool, make necessary adjustments to the brake shoes. Turn the adjuster clockwise to expand the shoes outward until they lightly contact the drum. This ensures that the brakes engage effectively when used.
Step 6 Install New Brake Shoes and Springs
If you are replacing the brake shoes, use the brake spring tool to help in the positioning and securing of the new springs. This will make the process safer and easier, preventing injuries from sudden spring tension.
Step 7 Reattach the Brake Drum
Carefully slide the brake drum back onto the hub. Rotate it by hand to ensure that it moves freely without any obstruction from the shoes. If it feels tightly fitted, adjust the shoes again.
Step 8 Replace the Wheel
Once everything is in place, reattach the wheel, tighten the lug nuts by hand, and lower the vehicle. After lowering, use a ratcheting wrench to tighten the lug nuts to the manufacturer’s specifications.
Conclusion
Maintaining drum brakes may seem daunting, but with the right tools and knowledge, it can be a straightforward process. By following these steps and using the appropriate tools, you can ensure your brake system functions effectively, enhancing your vehicle's safety. Always remember to consult your vehicle's service manual for specific instructions and safety precautions. Happy wrenching!
-
What Are Drum BrakesNewsJul.07,2025
-
Understanding Brake Drum MaterialNewsJul.07,2025
-
Semi-Trailer Brake Drum: A Key Component for Extreme Loads and Long-Distance TransportNewsJul.07,2025
-
Drum Brake Pads for SaleNewsJul.07,2025
-
Brake Drums for SaleNewsJul.07,2025
-
Brake Drum ManufacturerNewsJul.07,2025
-
Aluminum Brake Drums: The Future of High-Performance CarsNewsJul.07,2025
