-
 Afrikaans
 -
 Albanian
 -
 Amharic
 -
 Arabic
 -
 Armenian
 -
 Azerbaijani
 -
 Basque
 -
 Belarusian
 -
 Bengali
 -
 Bosnian
 -
 Bulgarian
 -
 Catalan
 -
 Cebuano
 -
 Corsican
 -
 Croatian
 -
 Czech
Czech -
 Danish
 -
 Dutch
Dutch -
 English
 -
 Esperanto
 -
 Estonian
 -
 Finnish
 -
 French
 -
 Frisian
 -
 Galician
 -
 Georgian
 -
 German
 -
 Greek
Greek -
 Gujarati
 -
 Haitian Creole
 -
 hausa
hausa -
 hawaiian
 -
 Hebrew
 -
 Hindi
Hindi -
 Miao
Miao -
 Hungarian
 -
 Icelandic
 -
 igbo
igbo -
 Indonesian
 -
 irish
irish -
 Italian
 -
 Japanese
 -
 Javanese
 -
 Kannada
 -
 kazakh
 -
 Khmer
Khmer -
 Rwandese
 -
 Korean
 -
 Kurdish
 -
 Kyrgyz
 -
 Lao
Lao -
 Latin
Latin -
 Latvian
 -
 Lithuanian
 -
 Luxembourgish
 -
 Macedonian
 -
 Malgashi
 -
 Malay
Malay -
 Malayalam
 -
 Maltese
 -
 Maori
Maori -
 Marathi
 -
 Mongolian
 -
 Myanmar
 -
 Nepali
 -
 Norwegian
 -
 Norwegian
 -
 Occitan
 -
 Pashto
 -
 Persian
 -
 Polish
 -
 Portuguese
 -
 Punjabi
 -
 Romanian
 -
 Russian
 -
 Samoan
 -
 Scottish Gaelic
 -
 Serbian
 -
 Sesotho
 -
 Shona
Shona -
 Sindhi
 -
 Sinhala
 -
 Slovak
 -
 Slovenian
 -
 Somali
 -
 Spanish
 -
 Sundanese
 -
 Swahili
 -
 Swedish
 -
 Tagalog
 -
 Tajik
Tajik -
 Tamil
Tamil -
 Tatar
Tatar -
 Telugu
 -
 Thai
Thai -
 Turkish
 -
 Turkmen
 -
 Ukrainian
 -
 Urdu
Urdu -
 Uighur
 -
 Uzbek
Uzbek -
 Vietnamese
 -
 Welsh
Welsh -
 Bantu
Bantu -
 Yiddish
 -
 Yoruba
 -
 Zulu
Zulu
Rear Brake Drum Removal Equipment for Efficient Maintenance Tasks
Understanding Rear Brake Drum Removal Tools
When it comes to vehicle maintenance, managing your braking system is paramount for safety. One critical aspect of brake maintenance is replacing or servicing brake drums. To accomplish this task efficiently, having the right tools is essential. In this article, we will explore the importance of rear brake drum removal tools, how they work, and their significance in automotive repair.
What Are Brake Drums?
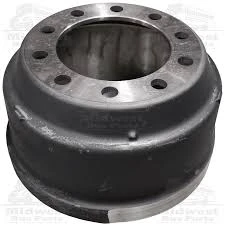
Brake drums are cylindrical components that house the brake shoes and are critical to the operation of drum brake systems. When the brakes are applied, hydraulic pressure forces the brake shoes against the inner surface of the drum, creating friction that slows down or stops the vehicle. Over time, brake drums can wear out, become warped, or suffer from scoring, necessitating removal for inspection or replacement.
The Importance of the Right Tools
While it may be possible to improvise, using appropriate tools designed specifically for rear brake drum removal can significantly simplify the process. These specialized tools not only save time but also reduce the risk of damage to the drum or other brake components. Additionally, incorrect methods of removal can lead to personal injury or costly repairs down the line.
Types of Rear Brake Drum Removal Tools
1. Drum Pullers These tools are designed to attach securely to the brake drum and exert an even force to pull it off the axle. Drum pullers come in various designs, but the most common feature a central bolt that pushes against the axle while pulling the drum outward. This ensures that the process is both safe and efficient.
2. Brake Tool Kits Many automotive repair shops utilize comprehensive tool kits that include various tools for drum brake maintenance, including drum pullers, brake spring tools, and reservoir wrenches. A complete kit can cover virtually every need associated with servicing drum brakes.
3. Rotary Tools In cases where the brake drum is rusted or corroded to the axle, rotary tools using grinding or cutting attachments can help break the bond. However, this should be a last resort, as it may damage the drum.
rear brake drum removal tool

Steps for Removing Rear Brake Drums
1. Safety First Before attempting to remove a brake drum, ensure that the vehicle is parked securely on a flat surface, and use wheel chocks to prevent it from rolling.
2. Elevate the Vehicle Use a jack to lift the rear of the vehicle, then secure it on jack stands. This will provide the necessary clearance to work safely.
3. Remove Tires Taking off the wheels will allow you to access the brake drums more easily.
4. Inspect and Prepare for Removal Identify any retaining screws or clips that may hold the drum in place. Remove these before proceeding.
5. Use the Drum Puller Attach the drum puller to the drum according to the manufacturer's instructions, ensuring a secure fit. Gradually tighten the central bolt, which will apply even force to the drum.
6. Check for Corrosion If the drum is stubbornly stuck, inspect for any corrosion that may be causing it to adhere to the axle. Use penetrating oil to aid in loosening.
Conclusion
Having the right rear brake drum removal tools can make a significant difference in the efficiency and safety of brake maintenance. By using specialized tools, you not only ensure that the job is done correctly but also extend the lifespan of your brake components. Whether you’re a seasoned mechanic or a DIY enthusiast, investing in quality brake drum removal tools is a wise choice for any automotive project. Always prioritize safety and follow proper procedures to maintain your vehicle’s braking system effectively.
-
What Are Drum BrakesNewsJul.07,2025
-
Understanding Brake Drum MaterialNewsJul.07,2025
-
Semi-Trailer Brake Drum: A Key Component for Extreme Loads and Long-Distance TransportNewsJul.07,2025
-
Drum Brake Pads for SaleNewsJul.07,2025
-
Brake Drums for SaleNewsJul.07,2025
-
Brake Drum ManufacturerNewsJul.07,2025
-
Aluminum Brake Drums: The Future of High-Performance CarsNewsJul.07,2025
