-
 Afrikaans
 -
 Albanian
 -
 Amharic
 -
 Arabic
 -
 Armenian
 -
 Azerbaijani
 -
 Basque
 -
 Belarusian
 -
 Bengali
 -
 Bosnian
 -
 Bulgarian
 -
 Catalan
 -
 Cebuano
 -
 Corsican
 -
 Croatian
 -
 Czech
Czech -
 Danish
 -
 Dutch
Dutch -
 English
 -
 Esperanto
 -
 Estonian
 -
 Finnish
 -
 French
 -
 Frisian
 -
 Galician
 -
 Georgian
 -
 German
 -
 Greek
Greek -
 Gujarati
 -
 Haitian Creole
 -
 hausa
hausa -
 hawaiian
 -
 Hebrew
 -
 Hindi
Hindi -
 Miao
Miao -
 Hungarian
 -
 Icelandic
 -
 igbo
igbo -
 Indonesian
 -
 irish
irish -
 Italian
 -
 Japanese
 -
 Javanese
 -
 Kannada
 -
 kazakh
 -
 Khmer
Khmer -
 Rwandese
 -
 Korean
 -
 Kurdish
 -
 Kyrgyz
 -
 Lao
Lao -
 Latin
Latin -
 Latvian
 -
 Lithuanian
 -
 Luxembourgish
 -
 Macedonian
 -
 Malgashi
 -
 Malay
Malay -
 Malayalam
 -
 Maltese
 -
 Maori
Maori -
 Marathi
 -
 Mongolian
 -
 Myanmar
 -
 Nepali
 -
 Norwegian
 -
 Norwegian
 -
 Occitan
 -
 Pashto
 -
 Persian
 -
 Polish
 -
 Portuguese
 -
 Punjabi
 -
 Romanian
 -
 Russian
 -
 Samoan
 -
 Scottish Gaelic
 -
 Serbian
 -
 Sesotho
 -
 Shona
Shona -
 Sindhi
 -
 Sinhala
 -
 Slovak
 -
 Slovenian
 -
 Somali
 -
 Spanish
 -
 Sundanese
 -
 Swahili
 -
 Swedish
 -
 Tagalog
 -
 Tajik
Tajik -
 Tamil
Tamil -
 Tatar
Tatar -
 Telugu
 -
 Thai
Thai -
 Turkish
 -
 Turkmen
 -
 Ukrainian
 -
 Urdu
Urdu -
 Uighur
 -
 Uzbek
Uzbek -
 Vietnamese
 -
 Welsh
Welsh -
 Bantu
Bantu -
 Yiddish
 -
 Yoruba
 -
 Zulu
Zulu
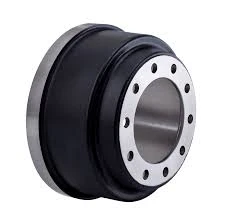
removing drum brakes
Removing Drum Brakes A Step-By-Step Guide
Drum brakes are a common component in many vehicles, known for their reliability and effectiveness. However, when it comes time for repair or replacement, you may find yourself needing to remove these components. This article provides a comprehensive guide on how to safely and effectively remove drum brakes.
Tools and Materials Needed
Before getting started, it’s essential to gather the necessary tools and materials. You will need
1. Jack and jack stands 2. Lug wrench 3. Screwdriver (flathead and Phillips) 4. Brake cleaner 5. Pliers 6. A bungee cord or rope (optional) 7. A replacement brake kit (if applicable)
1. Prepare the Vehicle
Start by parking your vehicle on a flat surface and engaging the parking brake. Loosen the lug nuts slightly while the wheel is still on the ground. Then, using the jack, lift the vehicle and securely place it on jack stands.
2. Remove the Wheel
Once the vehicle is safely elevated, remove the lug nuts completely and take off the wheel
. This will expose the drum brake assembly.3. Inspect the Drum
Before removing the drum, take a moment to inspect it for any visible damage or wear. If the drum is in excellent condition and you're only replacing the brake shoes, you might not need to remove it.
removing drum brakes

4. Remove the Brake Drum
If the drum is damaged and needs to be replaced, proceed to remove it. Look for any retaining screws or clips that may be holding the drum in place. If present, remove them using the appropriate screwdriver. If the drum is stuck due to rust or debris, gently tap around the drum's edge with a rubber mallet to loosen it. Once loose, it should slide off easily.
5. Detach the Brake Shoes
With the drum removed, you will see the brake shoes. Take a moment to note how everything is assembled, as you will need to replicate this when installing new brakes. Disconnect the springs and any other components holding the shoes in place using pliers. Be cautious, as these springs can be under tension.
6. Clean and Inspect Components
Before installing new parts, clean the area with brake cleaner to remove any dust and debris. Inspect the wheel cylinder and other components for leaks or damage.
7. Install New Brake Components
If you’re replacing the brake shoes, place the new components in the same configuration as the old ones. Reattach the springs and ensure everything is tight and secure.
Conclusion
Removing drum brakes may seem daunting, but with the right tools and a careful approach, it can be accomplished with ease. Always remember to consult your vehicle’s manual for specific instructions related to your model. Safety should be your top priority throughout the process. If you feel unsure, don't hesitate to seek professional assistance. By following these steps, you can ensure your brake system remains in optimal condition, contributing to your vehicle’s overall safety.
-
What Are Drum BrakesNewsJul.07,2025
-
Understanding Brake Drum MaterialNewsJul.07,2025
-
Semi-Trailer Brake Drum: A Key Component for Extreme Loads and Long-Distance TransportNewsJul.07,2025
-
Drum Brake Pads for SaleNewsJul.07,2025
-
Brake Drums for SaleNewsJul.07,2025
-
Brake Drum ManufacturerNewsJul.07,2025
-
Aluminum Brake Drums: The Future of High-Performance CarsNewsJul.07,2025
