-
 Afrikaans
 -
 Albanian
 -
 Amharic
 -
 Arabic
 -
 Armenian
 -
 Azerbaijani
 -
 Basque
 -
 Belarusian
 -
 Bengali
 -
 Bosnian
 -
 Bulgarian
 -
 Catalan
 -
 Cebuano
 -
 Corsican
 -
 Croatian
 -
 Czech
Czech -
 Danish
 -
 Dutch
Dutch -
 English
 -
 Esperanto
 -
 Estonian
 -
 Finnish
 -
 French
 -
 Frisian
 -
 Galician
 -
 Georgian
 -
 German
 -
 Greek
Greek -
 Gujarati
 -
 Haitian Creole
 -
 hausa
hausa -
 hawaiian
 -
 Hebrew
 -
 Hindi
Hindi -
 Miao
Miao -
 Hungarian
 -
 Icelandic
 -
 igbo
igbo -
 Indonesian
 -
 irish
irish -
 Italian
 -
 Japanese
 -
 Javanese
 -
 Kannada
 -
 kazakh
 -
 Khmer
Khmer -
 Rwandese
 -
 Korean
 -
 Kurdish
 -
 Kyrgyz
 -
 Lao
Lao -
 Latin
Latin -
 Latvian
 -
 Lithuanian
 -
 Luxembourgish
 -
 Macedonian
 -
 Malgashi
 -
 Malay
Malay -
 Malayalam
 -
 Maltese
 -
 Maori
Maori -
 Marathi
 -
 Mongolian
 -
 Myanmar
 -
 Nepali
 -
 Norwegian
 -
 Norwegian
 -
 Occitan
 -
 Pashto
 -
 Persian
 -
 Polish
 -
 Portuguese
 -
 Punjabi
 -
 Romanian
 -
 Russian
 -
 Samoan
 -
 Scottish Gaelic
 -
 Serbian
 -
 Sesotho
 -
 Shona
Shona -
 Sindhi
 -
 Sinhala
 -
 Slovak
 -
 Slovenian
 -
 Somali
 -
 Spanish
 -
 Sundanese
 -
 Swahili
 -
 Swedish
 -
 Tagalog
 -
 Tajik
Tajik -
 Tamil
Tamil -
 Tatar
Tatar -
 Telugu
 -
 Thai
Thai -
 Turkish
 -
 Turkmen
 -
 Ukrainian
 -
 Urdu
Urdu -
 Uighur
 -
 Uzbek
Uzbek -
 Vietnamese
 -
 Welsh
Welsh -
 Bantu
Bantu -
 Yiddish
 -
 Yoruba
 -
 Zulu
Zulu
Effective Methods for Spray Painting Brake Drums for Optimal Performance and Durability
The Art of Spray Painting Brake Drums A Step-by-Step Guide
Brake drums are a crucial component of a vehicle's braking system, often overlooked when it comes to maintenance and aesthetic appeal. While their primary purpose is functional, there’s no harm in adding a touch of style to these essential parts. Spray painting brake drums can not only enhance their appearance but also protect them from corrosion and wear. In this article, we will explore the process of spray painting brake drums, ensuring you achieve a professional-looking finish.
Step 1 Gather Your Materials
Before you begin, it's important to gather all necessary materials. You will need
- Brake drum cleaner - Sandpaper or a wire brush - Masking tape - Newspapers or drop cloths - Primer for metal surfaces - High-temperature spray paint (specifically designed for brake components) - Clear coat (optional for added protection) - Safety goggles and gloves
Step 2 Prepare the Brake Drum
Start by removing the brake drum from the vehicle. This is essential not only for ease of painting but also for ensuring you don’t get paint on other components. Once removed, clean the brake drum thoroughly using brake cleaner to remove dust, grease, and any residual materials. After cleaning, inspect the surface for rust or damage. If there is rust, use sandpaper or a wire brush to eliminate it, creating a smooth surface for painting.
Step 3 Set Up Your Workspace
Find a well-ventilated area to work on your project. Lay down newspapers or a drop cloth to protect your work surface from paint splatter. Make sure to wear safety goggles and gloves to protect yourself from fumes and debris during the preparation and painting processes.
Step 4 Mask Off Areas
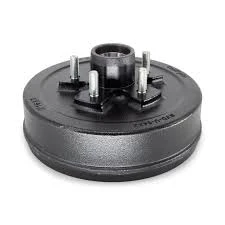
spray paint brake drums

To avoid getting paint where it is not wanted, use masking tape to cover any threaded areas or components that should remain unpainted. This will provide a clean, professional finish and save you the hassle of removing excess paint later.
Step 5 Apply Primer
Once your brake drum is prepped and masked, apply a layer of primer designed for metal surfaces. This step is crucial as it helps the paint adhere better and provides a more uniform finish. Allow the primer to dry according to the product instructions.
Step 6 Spray Paint the Brake Drum
With the primer dry, it’s time to spray paint. Choose a high-temperature spray paint designed for brake components, as these can withstand the heat generated during braking. Hold the can approximately 6-12 inches from the surface and spray in thin, even coats. It’s better to apply several light coats rather than one heavy coat to avoid drips and runs.
Step 7 Finish with Clear Coat
For added protection and a glossy finish, you may want to apply a clear coat after the paint has dried. This step is optional but can enhance durability significantly.
Conclusion
Spray painting brake drums can be a fun and rewarding DIY project. Not only does it improve the appearance of your vehicle, but it also offers an extra layer of protection against the elements. With the right materials and steps, you’ll have beautifully painted brake drums that enhance your vehicle's overall aesthetic while ensuring functionality. So grab your materials and get started on this easy automotive upgrade!
-
Rear Drum Brakes Maintenance TipsNewsAug.04,2025
-
Key Components Affecting Brake Drum FunctionNewsAug.04,2025
-
Important Inspection for Truck Drum BrakeNewsAug.04,2025
-
How to Prepare for Changing Rear Drum BrakesNewsAug.04,2025
-
Essential Tools for Cleaning Drum Brakes ProperlyNewsAug.04,2025
-
Brake Drum Function GuideNewsAug.04,2025
-
Safety Features of Red Brake DrumsNewsAug.01,2025
