-
 Afrikaans
 -
 Albanian
 -
 Amharic
 -
 Arabic
 -
 Armenian
 -
 Azerbaijani
 -
 Basque
 -
 Belarusian
 -
 Bengali
 -
 Bosnian
 -
 Bulgarian
 -
 Catalan
 -
 Cebuano
 -
 Corsican
 -
 Croatian
 -
 Czech
Czech -
 Danish
 -
 Dutch
Dutch -
 English
 -
 Esperanto
 -
 Estonian
 -
 Finnish
 -
 French
 -
 Frisian
 -
 Galician
 -
 Georgian
 -
 German
 -
 Greek
Greek -
 Gujarati
 -
 Haitian Creole
 -
 hausa
hausa -
 hawaiian
 -
 Hebrew
 -
 Hindi
Hindi -
 Miao
Miao -
 Hungarian
 -
 Icelandic
 -
 igbo
igbo -
 Indonesian
 -
 irish
irish -
 Italian
 -
 Japanese
 -
 Javanese
 -
 Kannada
 -
 kazakh
 -
 Khmer
Khmer -
 Rwandese
 -
 Korean
 -
 Kurdish
 -
 Kyrgyz
 -
 Lao
Lao -
 Latin
Latin -
 Latvian
 -
 Lithuanian
 -
 Luxembourgish
 -
 Macedonian
 -
 Malgashi
 -
 Malay
Malay -
 Malayalam
 -
 Maltese
 -
 Maori
Maori -
 Marathi
 -
 Mongolian
 -
 Myanmar
 -
 Nepali
 -
 Norwegian
 -
 Norwegian
 -
 Occitan
 -
 Pashto
 -
 Persian
 -
 Polish
 -
 Portuguese
 -
 Punjabi
 -
 Romanian
 -
 Russian
 -
 Samoan
 -
 Scottish Gaelic
 -
 Serbian
 -
 Sesotho
 -
 Shona
Shona -
 Sindhi
 -
 Sinhala
 -
 Slovak
 -
 Slovenian
 -
 Somali
 -
 Spanish
 -
 Sundanese
 -
 Swahili
 -
 Swedish
 -
 Tagalog
 -
 Tajik
Tajik -
 Tamil
Tamil -
 Tatar
Tatar -
 Telugu
 -
 Thai
Thai -
 Turkish
 -
 Turkmen
 -
 Ukrainian
 -
 Urdu
Urdu -
 Uighur
 -
 Uzbek
Uzbek -
 Vietnamese
 -
 Welsh
Welsh -
 Bantu
Bantu -
 Yiddish
 -
 Yoruba
 -
 Zulu
Zulu
tools to change drum brakes
Tools to Change Drum Brakes
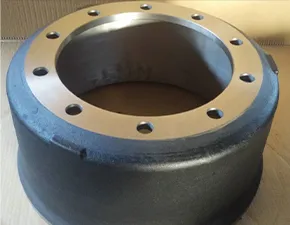
Changing drum brakes can seem like a daunting task, but with the right tools and a bit of knowledge, it can be accomplished effectively. Drum brakes are commonly found on older vehicles and are often used in the rear brake system of many cars today. Understanding the necessary tools and techniques is essential for anyone looking to take on this maintenance job.
Essential Tools
1. Jack and Jack Stands Safety is paramount when working under a vehicle. A reliable hydraulic floor jack will lift your car high enough to access the wheels. Once elevated, jack stands should be positioned beneath the vehicle for added safety.
2. Lug Wrench Before lifting the vehicle, you’ll need a lug wrench to loosen and remove the wheel nuts. A cross-shaped lug wrench provides better leverage, making it easier to break loose stubborn lug nuts.
3. Brake Tool Kit A specialized brake tool kit includes a variety of tools designed specifically for working on drum brakes. This typically contains a brake spring tool to help remove and install springs, a brake adjuster tool to adjust the brake shoes, and a flathead screwdriver for prying off various components.
4. Socket Set A basic socket set is crucial for removing the drum brake assembly. Various sizes may be needed, so having both metric and standard sizes on hand is beneficial.
5. Pliers and Wire Cutters Needle-nose pliers can be helpful for accessing tight spaces and manipulating springs. Wire cutters may be necessary to cut any old springs that may be difficult to remove.
6. Brake Cleaner Before reassembling, cleaning the brake drum and components is vital. Brake cleaner helps to remove dust, grease, and debris, ensuring optimal performance of the braking system.
tools to change drum brakes

Steps to Change Drum Brakes
1. Preparation Begin by loosening the lug nuts with the lug wrench before raising the vehicle. Once elevated and secure on jack stands, remove the wheels to expose the drum brakes.
2. Remove the Brake Drum If the drum is stuck, tap it lightly with a rubber mallet or use a puller tool. This will help dislodge any rust or debris that may be causing it to stick.
3. Inspect and Replace Components Check the condition of the brake shoes, springs, and adjusters. Replace any worn or damaged parts with new ones from your brake kit.
4. Reassemble Use the brake tool kit to install the new brake shoes, securing them with the springs and adjusters. Make sure everything is properly aligned.
5. Reattach the Brake Drum Place the drum back onto the hub, ensuring that it fits snugly.
6. Finish Up Reattach the wheel, lower the vehicle, and use the lug wrench to secure the lug nuts.
Conclusion
Changing drum brakes can be a rewarding DIY project that saves money and enhances your understanding of vehicle maintenance. With the right tools and safety precautions, you can successfully complete this task and ensure your vehicle remains safe and efficient on the road. Always remember to consult your vehicle’s manual for specific instructions and specifications regarding your brake system.
-
What Are Drum BrakesNewsJul.07,2025
-
Understanding Brake Drum MaterialNewsJul.07,2025
-
Semi-Trailer Brake Drum: A Key Component for Extreme Loads and Long-Distance TransportNewsJul.07,2025
-
Drum Brake Pads for SaleNewsJul.07,2025
-
Brake Drums for SaleNewsJul.07,2025
-
Brake Drum ManufacturerNewsJul.07,2025
-
Aluminum Brake Drums: The Future of High-Performance CarsNewsJul.07,2025
