-
 Afrikaans
 -
 Albanian
 -
 Amharic
 -
 Arabic
 -
 Armenian
 -
 Azerbaijani
 -
 Basque
 -
 Belarusian
 -
 Bengali
 -
 Bosnian
 -
 Bulgarian
 -
 Catalan
 -
 Cebuano
 -
 Corsican
 -
 Croatian
 -
 Czech
Czech -
 Danish
 -
 Dutch
Dutch -
 Ingles
 -
 Esperanto
 -
 Estonian
 -
 Finnish
 -
 French
 -
 Frisian
 -
 Galician
 -
 Georgian
 -
 German
 -
 Greek
Greek -
 Gujarati
 -
 Haitian Creole
 -
 hausa
hausa -
 hawaiian
 -
 Hebrew
 -
 Hindi
Hindi -
 Miao
Miao -
 Hungarian
 -
 Icelandic
 -
 igbo
igbo -
 Indonesian
 -
 irish
irish -
 Italian
 -
 Japanese
 -
 Javanese
 -
 Kannada
 -
 kazakh
 -
 Khmer
Khmer -
 Rwandese
 -
 Korean
 -
 Kurdish
 -
 Kyrgyz
 -
 Lao
Lao -
 Latin
Latin -
 Latvian
 -
 Lithuanian
 -
 Luxembourgish
 -
 Macedonian
 -
 Malgashi
 -
 Malay
Malay -
 Malayalam
 -
 Maltese
 -
 Maori
Maori -
 Marathi
 -
 Mongolian
 -
 Myanmar
 -
 Nepali
 -
 Norwegian
 -
 Norwegian
 -
 Occitan
 -
 Pashto
 -
 Persian
 -
 Polish
 -
 Portuguese
 -
 Punjabi
 -
 Romanian
 -
 Russian
 -
 Samoan
 -
 Scottish Gaelic
 -
 Serbian
 -
 Sesotho
 -
 Shona
Shona -
 Sindhi
 -
 Sinhala
 -
 Slovak
 -
 Slovenian
 -
 Somali
 -
 Spanish
 -
 Sundanese
 -
 Swahili
 -
 Swedish
 -
 Tagalog
 -
 Tajik
Tajik -
 Tamil
Tamil -
 Tatar
Tatar -
 Telugu
 -
 Thai
Thai -
 Turkish
 -
 Turkmen
 -
 Ukrainian
 -
 Urdu
Urdu -
 Uighur
 -
 Uzbek
Uzbek -
 Vietnamese
 -
 Welsh
Welsh -
 Bantu
Bantu -
 Yiddish
 -
 Yoruba
 -
 Zulu
Zulu
how to adjust self-adjusting drum brakes
How to Adjust Self-Adjusting Drum Brakes
Self-adjusting drum brakes are a crucial component of many vehicles, providing the necessary stopping power while ensuring a smooth and efficient braking experience. Over time, these brakes can become misaligned or worn, which may lead to decreased performance. Therefore, understanding how to adjust self-adjusting drum brakes can help maintain optimal braking function and prolong the lifespan of your vehicle's braking system.
Understanding Self-Adjusting Drum Brakes
Self-adjusting drum brakes work by using a mechanism that automatically adjusts the brake shoes based on wear. As the brake shoes wear down, the self-adjusters, typically a ratcheting system, will gradually take up the slack, allowing the brakes to maintain proper contact with the drum. This system reduces the need for frequent manual adjustments, but that doesn’t mean you should completely neglect your brake maintenance.
Checking Brake Performance
Before diving into the adjustment process, you should first assess the performance of your drum brakes. Signs that your brakes may need adjustment include
- A soft or spongy brake pedal - Uneven braking or pulling to one side - Increased stopping distance - A grinding or squeaking noise when applying brakes
If you notice any of these symptoms, it’s time to check the self-adjusting system.
Preparation for Adjustment
1. Safety First Begin by parking your vehicle on a level surface and applying the parking brake. It’s advisable to wear safety goggles and gloves during the process to protect yourself.
2. Gather Tools You will need basic hand tools, including a lug wrench, socket set, and a brake adjusting tool or flathead screwdriver.
how to adjust self-adjusting drum brakes

3. Remove the Wheel Loosen the lug nuts and remove the wheel to access the drum brake assembly. Make sure to place the wheel under the vehicle for extra safety.
Adjusting the Brakes
1. Inspect the Brake Assembly Once the drum is exposed, look for any signs of wear or damage. Check the brake shoes, springs, and the adjuster mechanism.
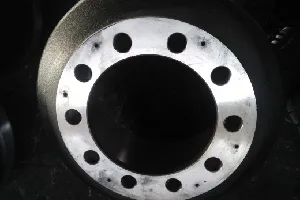
2. Locate the Adjuster The adjuster is usually found on the bottom side of the brake assembly. It can be a small wheel or gear that the brake shoes rest against.
3. Manual Adjustment Using a brake adjusting tool or flathead screwdriver, turn the adjuster. Turn it clockwise to expand the shoes outward, or counterclockwise to retract them. The goal is to create a slight dragging feeling when you turn the drum by hand.
4. Reassemble Once adjusted, replace the drum and wheel. Ensure all components are secure before lowering the vehicle.
Test the Brakes
After you have reassembled the wheel and lowered the vehicle, it is vital to test the brakes. Press the brake pedal several times to ensure that the brakes engage correctly and the vehicle stops smoothly. A test drive around a parking lot can also help you evaluate the effectiveness of your adjustments.
Conclusion
Proper adjustment of self-adjusting drum brakes can greatly enhance your vehicle's safety and performance. While the self-adjusting feature reduces the need for frequent adjustments, regular checks are still essential. By following these steps, you can maintain your brakes efficiently and keep your vehicle performing at its best. Remember, if you’re unsure or uncomfortable making these adjustments yourself, it's always best to seek professional help.
-
Why Choosing the Right Brake Drum Manufacturer Matters for Vehicle Safety and PerformanceBalitaJun.05,2025
-
Understanding Heavy Duty Brake Drums: Key to Truck Safety and PerformanceBalitaJun.05,2025
-
Reliable Braking Systems: Rear and Trailer Drum Brake Solutions for Heavy-Duty ApplicationsBalitaJun.05,2025
-
Power and Precision: Why Brake Drums Still Dominate in Vehicle Safety SystemsBalitaJun.05,2025
-
Brake Drums: Essential Components for Vehicle Safety and PerformanceBalitaJun.05,2025
-
Superior Brake Drums & Rotors for Reliable Stopping PowerBalitaJun.03,2025
-
Premium Brake Drums for Maximum Stopping PowerBalitaJun.03,2025
