-
 Afrikaans
 -
 Albanian
 -
 Amharic
 -
 Arabic
 -
 Armenian
 -
 Azerbaijani
 -
 Basque
 -
 Belarusian
 -
 Bengali
 -
 Bosnian
 -
 Bulgarian
 -
 Catalan
 -
 Cebuano
 -
 Corsican
 -
 Croatian
 -
 Czech
Czech -
 Danish
 -
 Dutch
Dutch -
 Ingles
 -
 Esperanto
 -
 Estonian
 -
 Finnish
 -
 French
 -
 Frisian
 -
 Galician
 -
 Georgian
 -
 German
 -
 Greek
Greek -
 Gujarati
 -
 Haitian Creole
 -
 hausa
hausa -
 hawaiian
 -
 Hebrew
 -
 Hindi
Hindi -
 Miao
Miao -
 Hungarian
 -
 Icelandic
 -
 igbo
igbo -
 Indonesian
 -
 irish
irish -
 Italian
 -
 Japanese
 -
 Javanese
 -
 Kannada
 -
 kazakh
 -
 Khmer
Khmer -
 Rwandese
 -
 Korean
 -
 Kurdish
 -
 Kyrgyz
 -
 Lao
Lao -
 Latin
Latin -
 Latvian
 -
 Lithuanian
 -
 Luxembourgish
 -
 Macedonian
 -
 Malgashi
 -
 Malay
Malay -
 Malayalam
 -
 Maltese
 -
 Maori
Maori -
 Marathi
 -
 Mongolian
 -
 Myanmar
 -
 Nepali
 -
 Norwegian
 -
 Norwegian
 -
 Occitan
 -
 Pashto
 -
 Persian
 -
 Polish
 -
 Portuguese
 -
 Punjabi
 -
 Romanian
 -
 Russian
 -
 Samoan
 -
 Scottish Gaelic
 -
 Serbian
 -
 Sesotho
 -
 Shona
Shona -
 Sindhi
 -
 Sinhala
 -
 Slovak
 -
 Slovenian
 -
 Somali
 -
 Spanish
 -
 Sundanese
 -
 Swahili
 -
 Swedish
 -
 Tagalog
 -
 Tajik
Tajik -
 Tamil
Tamil -
 Tatar
Tatar -
 Telugu
 -
 Thai
Thai -
 Turkish
 -
 Turkmen
 -
 Ukrainian
 -
 Urdu
Urdu -
 Uighur
 -
 Uzbek
Uzbek -
 Vietnamese
 -
 Welsh
Welsh -
 Bantu
Bantu -
 Yiddish
 -
 Yoruba
 -
 Zulu
Zulu
how to remove drum brake cover
How to Remove a Drum Brake Cover
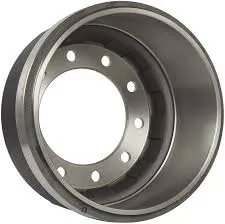
Removing a drum brake cover is a critical task for anyone looking to service their vehicle's braking system. Whether you’re performing routine maintenance or replacing worn-out components, understanding the proper procedure is essential for safety and efficiency. Here’s a step-by-step guide to help you through the process.
Tools and Materials Needed
Before you begin, make sure you have the right tools on hand. You will need
- Jack and jack stands - Lug wrench - Brake cleaner - Screwdriver set - Ratchet and socket set - Torque wrench
Step 1 Prepare Your Vehicle
Start by ensuring your vehicle is parked on a flat surface. Activate the parking brake and turn off the engine. For additional safety, place wheel chocks behind the tires to prevent movement.
Step 2 Lift the Vehicle
Using the lug wrench, loosen the lug nuts on the rear wheel slightly while the vehicle is still on the ground. Then, use the jack to lift the vehicle off the ground. Once elevated, secure the vehicle with jack stands. Remove the lug nuts completely and take off the wheel to access the drum brake assembly.
Step 3 Inspect the Drum Brake
Take a moment to inspect the drum brake components, paying attention to the condition of the brake shoes and springs. This will provide insight into any additional work that may be needed.
how to remove drum brake cover

Step 4 Remove the Drum Brake Cover
To remove the drum brake cover, you will typically find a series of screws or retaining clips holding it in place. Using the appropriate screwdriver, remove these screws or clips. In some cases, you may need to tap gently around the edges of the drum with a rubber mallet if it is stuck due to rust or dirt buildup.
Step 5 Detach the Brake Shoes
Once the cover is removed, you will have access to the brake shoes. Carefully detach the springs and any clips securing the shoes to the backing plate. Take photo references if necessary, so you can easily reassemble everything later.
Step 6 Clean and Inspect
With the drum and shoes removed, clean any dirt or debris using brake cleaner. Inspect all parts for wear and replace any damaged components. This is also a good time to check the condition of your brake lines and cylinders.
Step 7 Reassemble
To reassemble, follow the steps in reverse order. Make sure all components are fit securely, and torque the screws to the manufacturer’s specifications. Reattach the wheel, lower the vehicle, and tighten the lug nuts.
Conclusion
Removing a drum brake cover may seem daunting, but by following these steps carefully, you can complete the job efficiently and safely. Always prioritize safety by wearing gloves and eye protection, and consult your vehicle’s manual for specific instructions. Regular maintenance of your brake system is crucial for optimal vehicle performance.
-
Upgrade Your Braking System with High-Quality Brake DrumsBalitaJun.25,2025
-
Top Quality Brake Drums at Best PricesBalitaJun.25,2025
-
Save Money with Reliable Truck Drum BrakesBalitaJun.25,2025
-
Reliable Brake Drums for Sale – Safe Stops, Great ValueBalitaJun.25,2025
-
Heavy-Duty Brake Drums for Trucks & TrailersBalitaJun.25,2025
-
China’s Top-Quality Brake Drum: Safe & Durable Stopping PowerBalitaJun.25,2025
-
Why Choosing the Right Brake Drum Manufacturer Matters for Vehicle Safety and PerformanceBalitaJun.05,2025
