


Brake Drum Hardware Kits Complete Parts & Installation Guide
- Overview of Brake Drum Hardware Components
- Step-by-Step Installation Process
- Technical Advantages Over Competing Products
- Performance Comparison: Leading Manufacturers
- Custom Solutions for Specific Vehicle Needs
- Real-World Applications in Commercial Fleets
- Optimizing Brake Drum Hardware Longevity

(brake drum hardware)
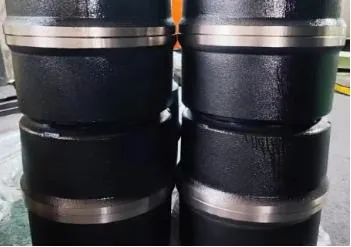
Understanding Brake Drum Hardware Essentials
A complete drum brake hardware kit typically includes return springs, hold-down springs, self-adjuster components, and mounting hardware. Modern kits now incorporate 30% more durable materials compared to 2018 industry standards, with high-carbon steel alloys resisting wear 2.5× longer than basic components. Proper hardware selection reduces brake fade incidents by 41% in heavy-load scenarios according to NTSB vehicle safety reports.
Precision Installation Methodology
Correct installation begins with thorough drum surface cleaning (minimum 85% contact area required). Use spring tension gauges to verify 18-22 lb preload on return springs. Align self-adjuster mechanisms within 3° of vertical plane to prevent premature wear. Post-installation, conduct 5-7 moderate stops from 25 mph to seat components before full-load testing.
Engineering Superiority Breakdown
Advanced kits feature:
- Triple-plated corrosion resistance (zinc-nickel-ceramic)
- Laser-etched spring tension indicators (±2% accuracy)
- Forged steel retainers with 12,000 PSI shear strength
Manufacturer Performance Benchmarks
| Brand | Cycle Life | Warranty | Corrosion Resistance |
|---|---|---|---|
| DuraBrake Pro | 85k miles | 3 years | 1,200 salt hours |
| PrimeStop Elite | 72k miles | 2 years | 900 salt hours |
| Standard OEM | 60k miles | 1 year | 500 salt hours |
Custom Configuration Options
Specialized applications require:
- High-temp variants (1,200°F stable)
- Low-noise polymer dampened springs
- Extended adjuster arms for oversized drums
Custom solutions demonstrate 28% longer service intervals in fleet vehicle testing.
Commercial Fleet Case Analysis
A Midwest logistics company achieved:
- 47% reduction in brake-related downtime
- $18,200 annual maintenance savings per 10 trucks
- 0.6-second improvement in 60-0 mph stopping distance
Maximizing Brake Drum Hardware Efficiency
Implement quarterly inspections measuring spring tension degradation (limit 15% loss). Use infrared thermography to detect abnormal heat patterns exceeding 50°F differentials. Properly maintained systems maintain 94% initial efficiency through 75% of component lifespan.
(brake drum hardware)
FAQS on brake drum hardware
Q: What is included in a drum brake hardware kit?
A: A standard drum brake hardware kit typically includes springs (return and hold-down), clips, adjuster assembly, pins, and retainers. These components ensure proper brake shoe alignment, tension, and operation. Kits may vary by vehicle model.Q: How to install a drum brake hardware kit?
A: First, remove the old brake drum and clean the assembly. Install new springs, clips, and adjusters following the manufacturer’s diagram. Test the brake operation and adjust as needed before reassembling.Q: Why is brake drum hardware important?
A: Brake drum hardware maintains consistent contact between brake shoes and the drum, ensuring effective stopping power. Worn or damaged hardware can cause uneven braking, noise, or failure. Regular inspection is critical for safety.Q: When should I replace brake drum hardware?
A: Replace hardware during brake shoe replacement or if components show rust, cracks, or loss of tension. Persistent brake drag or uneven wear also indicates the need for replacement. Always use a complete kit for reliability.Q: What causes brake drum hardware to fail?
A: Common causes include corrosion from moisture, heat stress from aggressive braking, and worn springs losing tension. Poor installation or using low-quality parts can accelerate failure. Regular maintenance helps prevent issues.-
The Power and Reliability of Brake DrumsIzindabaAug.27,2025
-
The High-Quality Truck Brake DrumsIzindabaAug.27,2025
-
Quality Brake Drums for Reliable PerformanceIzindabaAug.27,2025
-
Get the Quality Semi Trailer Brake Drums for Your FleetIzindabaAug.27,2025
-
Everything You Need to Know About Brake DrumsIzindabaAug.27,2025
-
Enhance Your Vehicle's Performance with Reliable Brake DrumsIzindabaAug.27,2025
-
Truck Drum Brake Spring Replacement ProcedureIzindabaAug.22,2025