-
 Afrikaans
 -
 Albanian
 -
 Amharic
 -
 Arabic
 -
 Armenian
 -
 Azerbaijani
 -
 Basque
 -
 Belarusian
 -
 Bengali
 -
 Bosnian
 -
 Bulgarian
 -
 Catalan
 -
 Cebuano
 -
 Corsican
 -
 Croatian
 -
 Czech
Czech -
 Danish
 -
 Dutch
Dutch -
 IsiNgisi
 -
 Esperanto
 -
 Estonian
 -
 Finnish
 -
 French
 -
 Frisian
 -
 Galician
 -
 Georgian
 -
 German
 -
 Greek
Greek -
 Gujarati
 -
 Haitian Creole
 -
 hausa
hausa -
 hawaiian
 -
 Hebrew
 -
 Hindi
Hindi -
 Miao
Miao -
 Hungarian
 -
 Icelandic
 -
 igbo
igbo -
 Indonesian
 -
 irish
irish -
 Italian
 -
 Japanese
 -
 Javanese
 -
 Kannada
 -
 kazakh
 -
 Khmer
Khmer -
 Rwandese
 -
 Korean
 -
 Kurdish
 -
 Kyrgyz
 -
 Lao
Lao -
 Latin
Latin -
 Latvian
 -
 Lithuanian
 -
 Luxembourgish
 -
 Macedonian
 -
 Malgashi
 -
 Malay
Malay -
 Malayalam
 -
 Maltese
 -
 Maori
Maori -
 Marathi
 -
 Mongolian
 -
 Myanmar
 -
 Nepali
 -
 Norwegian
 -
 Norwegian
 -
 Occitan
 -
 Pashto
 -
 Persian
 -
 Polish
 -
 Portuguese
 -
 Punjabi
 -
 Romanian
 -
 Russian
 -
 Samoan
 -
 Scottish Gaelic
 -
 Serbian
 -
 Sesotho
 -
 Shona
Shona -
 Sindhi
 -
 Sinhala
 -
 Slovak
 -
 Slovenian
 -
 Somali
 -
 Spanish
 -
 Sundanese
 -
 Swahili
 -
 Swedish
 -
 Tagalog
 -
 Tajik
Tajik -
 Tamil
Tamil -
 Tatar
Tatar -
 Telugu
 -
 Thai
Thai -
 Turkish
 -
 Turkmen
 -
 Ukrainian
 -
 Urdu
Urdu -
 Uighur
 -
 Uzbek
Uzbek -
 Vietnamese
 -
 Welsh
Welsh -
 Bantu
Bantu -
 Yiddish
 -
 Yoruba
 -
 Zulu
Zulu
how to bleed trailer drum brakes
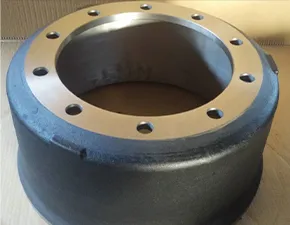
How to Bleed Trailer Drum Brakes A Step-by-Step Guide
Maintaining your trailer’s braking system is essential for safety and performance, especially when dealing with drum brakes. Over time, air can infiltrate the brake lines, leading to decreased braking efficiency. Bleeding the brakes is a crucial process that removes air from the hydraulic system and ensures optimal functioning. Here’s a step-by-step guide on how to bleed trailer drum brakes.
What You Need
1. Brake fluid (consult your owner's manual for the correct type) 2. A brake bleeder kit or a clear plastic tube and a container 3. A wrench for loosening bleeder valves 4. A helper (optional but recommended) 5. Safety goggles and gloves
Step 1 Prepare Your Trailer
First, ensure your trailer is parked on a flat surface and securely supported. Engage the parking brake, and if applicable, chock the wheels to prevent any movement during the process.
Step 2 Remove the Wheel Hub
Using a wrench, loosen and remove the lug nuts from the wheel, then take off the wheel hub to access the drum brake assembly.
Step 3 Locate the Bleeder Valve
The bleeder valve is typically located on the brake assembly. It is a small valve that is often capped and should be easy to identify.
how to bleed trailer drum brakes

Step 4 Attach the Bleeder Kit
If you're using a bleeder kit, follow the manufacturer's instructions. If using a plastic tube, attach one end to the bleeder valve and place the other end in a container to catch the old fluid.
Step 5 Fill the Master Cylinder
Before you start bleeding, check the brake fluid level in the master cylinder. Top it off with fresh brake fluid to ensure the system is properly filled.
Step 6 Begin Bleeding
With your helper in the driver’s seat, instruct them to pump the brake pedal several times and then hold it down. While they do this, loosen the bleeder valve slightly using your wrench. This will allow air and old fluid to escape. Once the flow slows, tighten the valve before your helper releases the brake pedal. Repeat this process, checking the fluid level periodically, until you see a steady stream of clear brake fluid without bubbles.
Step 7 Reassemble and Test
After bleeding all the wheels, reassemble the wheel hub and secure it with the lug nuts. Make sure to torque them to the manufacturer’s specifications. Finally, test the brakes by going for a slow drive in a safe area to ensure they function properly.
In conclusion, bleeding trailer drum brakes is a straightforward process that can significantly enhance your trailer's braking performance. Regular maintenance will ensure a safer towing experience.
-
Rear Drum Brakes Maintenance TipsIzindabaAug.04,2025
-
Key Components Affecting Brake Drum FunctionIzindabaAug.04,2025
-
Important Inspection for Truck Drum BrakeIzindabaAug.04,2025
-
How to Prepare for Changing Rear Drum BrakesIzindabaAug.04,2025
-
Essential Tools for Cleaning Drum Brakes ProperlyIzindabaAug.04,2025
-
Brake Drum Function GuideIzindabaAug.04,2025
-
Safety Features of Red Brake DrumsIzindabaAug.01,2025
