-
 Afrikaans
 -
 Albanian
 -
 Amharic
 -
 Arabic
 -
 Armenian
 -
 Azerbaijani
 -
 Basque
 -
 Belarusian
 -
 Bengali
 -
 Bosnian
 -
 Bulgarian
 -
 Catalan
 -
 Cebuano
 -
 Corsican
 -
 Croatian
 -
 Czech
Czech -
 Danish
 -
 Dutch
Dutch -
 English
 -
 Esperanto
 -
 Estonian
 -
 Finnish
 -
 French
 -
 Frisian
 -
 Galician
 -
 Georgian
 -
 German
 -
 Greek
Greek -
 Gujarati
 -
 Haitian Creole
 -
 hausa
hausa -
 hawaiian
 -
 Hebrew
 -
 Hindi
Hindi -
 Miao
Miao -
 Hungarian
 -
 Icelandic
 -
 igbo
igbo -
 Indonesian
 -
 irish
irish -
 Italian
 -
 Japanese
 -
 Javanese
 -
 Kannada
 -
 kazakh
 -
 Khmer
Khmer -
 Rwandese
 -
 Korean
 -
 Kurdish
 -
 Kyrgyz
 -
 Lao
Lao -
 Latin
Latin -
 Latvian
 -
 Lithuanian
 -
 Luxembourgish
 -
 Macedonian
 -
 Malgashi
 -
 Malay
Malay -
 Malayalam
 -
 Maltese
 -
 Maori
Maori -
 Marathi
 -
 Mongolian
 -
 Myanmar
 -
 Nepali
 -
 Norwegian
 -
 Norwegian
 -
 Occitan
 -
 Pashto
 -
 Persian
 -
 Polish
 -
 Portuguese
 -
 Punjabi
 -
 Romanian
 -
 Russian
 -
 Samoan
 -
 Scottish Gaelic
 -
 Serbian
 -
 Sesotho
 -
 Shona
Shona -
 Sindhi
 -
 Sinhala
 -
 Slovak
 -
 Slovenian
 -
 Somali
 -
 Spanish
 -
 Sundanese
 -
 Swahili
 -
 Swedish
 -
 Tagalog
 -
 Tajik
Tajik -
 Tamil
Tamil -
 Tatar
Tatar -
 Telugu
 -
 Thai
Thai -
 Turkish
 -
 Turkmen
 -
 Ukrainian
 -
 Urdu
Urdu -
 Uighur
 -
 Uzbek
Uzbek -
 Vietnamese
 -
 Welsh
Welsh -
 Bantu
Bantu -
 Yiddish
 -
 Yoruba
 -
 Zulu
Zulu
how to remove brake drum on trailer
How to Remove a Brake Drum on a Trailer
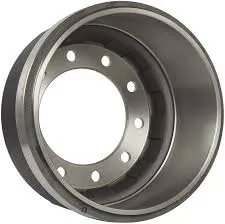
Maintaining your trailer’s braking system is crucial for safety and performance. One essential task in this maintenance process is removing the brake drum when necessary, whether it's for inspection, replacement, or repair. Here’s a step-by-step guide to help you understand how to effectively remove a brake drum from your trailer.
Tools and Materials Needed
Before you begin, ensure you have the following tools and materials
- Jack and jack stands - Lug wrench - Brake cleaner - Hammer or rubber mallet - Screwdriver (flathead) - Gloves and safety goggles
Step 1 Safety First
Safety should always be your top priority. Start by parking your trailer on a level surface and ensuring the wheels are chocked to prevent any movement. Wear safety goggles and gloves to protect yourself during the process.
Step 2 Lift the Trailer
Using a jack, lift the trailer from the frame near the wheel you are working on. Once elevated, secure the height with jack stands to ensure it remains stable while you work. Never rely solely on the jack for support.
Step 3 Remove the Wheel
Before accessing the brake drum, you'll need to remove the wheel. Using a lug wrench, loosen the lug nuts but do not remove them completely while the wheel is still on the ground. After loosening, remove the lug nuts fully and take the wheel off, setting it aside.
Step 4 Inspect the Brake Drum
how to remove brake drum on trailer

With the wheel removed, you’ll see the brake drum. Inspect the drum for any visible damage such as cracks or scoring. If it's in good condition and needs only a simple removal for inspection, you can proceed to the next step.
Step 5 Remove the Brake Drum
Brake drums may be secured by retaining screws, so check for these and use a screwdriver to remove them if present. Sometimes, the drum may stick to the hub due to rust or debris. If this is the case, gently tap the drum with a hammer or rubber mallet around the edges to loosen it. Be careful not to apply too much force, as this can damage the drum.
If the drum still resists, you may need to adjust the brake shoes slightly by applying the appropriate adjustment tool from the backside of the assembly. Look for a rubber plug on the back of the drum - when you remove it, you should see the adjuster.
Step 6 Remove the Drum Completely
Once the drum is free, gently pull it straight off the hub. Be mindful of the brake shoes, which may still have some tension. If you encounter any resistance, double-check for any remaining screws or debris causing the blockage.
Step 7 Clean and Inspect
After removing the drum, clean the area thoroughly with brake cleaner to eliminate dust and debris. Inspect the brake components, including the shoes, springs, and adjuster, for wear and tear. Address any issues before reassembling.
Step 8 Reassemble
Once inspection and cleaning are complete, reassemble by sliding the drum back into place. Replace any screws removed during disassembly and ensure everything is tightened properly. Reattach the wheel, hand-tightening the lug nuts before lowering the trailer.
Conclusion
Removing a brake drum on a trailer is a task that, while straightforward, requires attention to detail and safety precautions. By following these steps, you can efficiently remove and inspect your brake drum, ensuring your trailer operates safely on the road. Remember, if you encounter difficulties or are uncertain, it’s always best to consult a professional mechanic for assistance.
-
What Are Drum BrakesNewsJul.07,2025
-
Understanding Brake Drum MaterialNewsJul.07,2025
-
Semi-Trailer Brake Drum: A Key Component for Extreme Loads and Long-Distance TransportNewsJul.07,2025
-
Drum Brake Pads for SaleNewsJul.07,2025
-
Brake Drums for SaleNewsJul.07,2025
-
Brake Drum ManufacturerNewsJul.07,2025
-
Aluminum Brake Drums: The Future of High-Performance CarsNewsJul.07,2025
